6.1. Vendors
Manage information about goods/service suppliers.
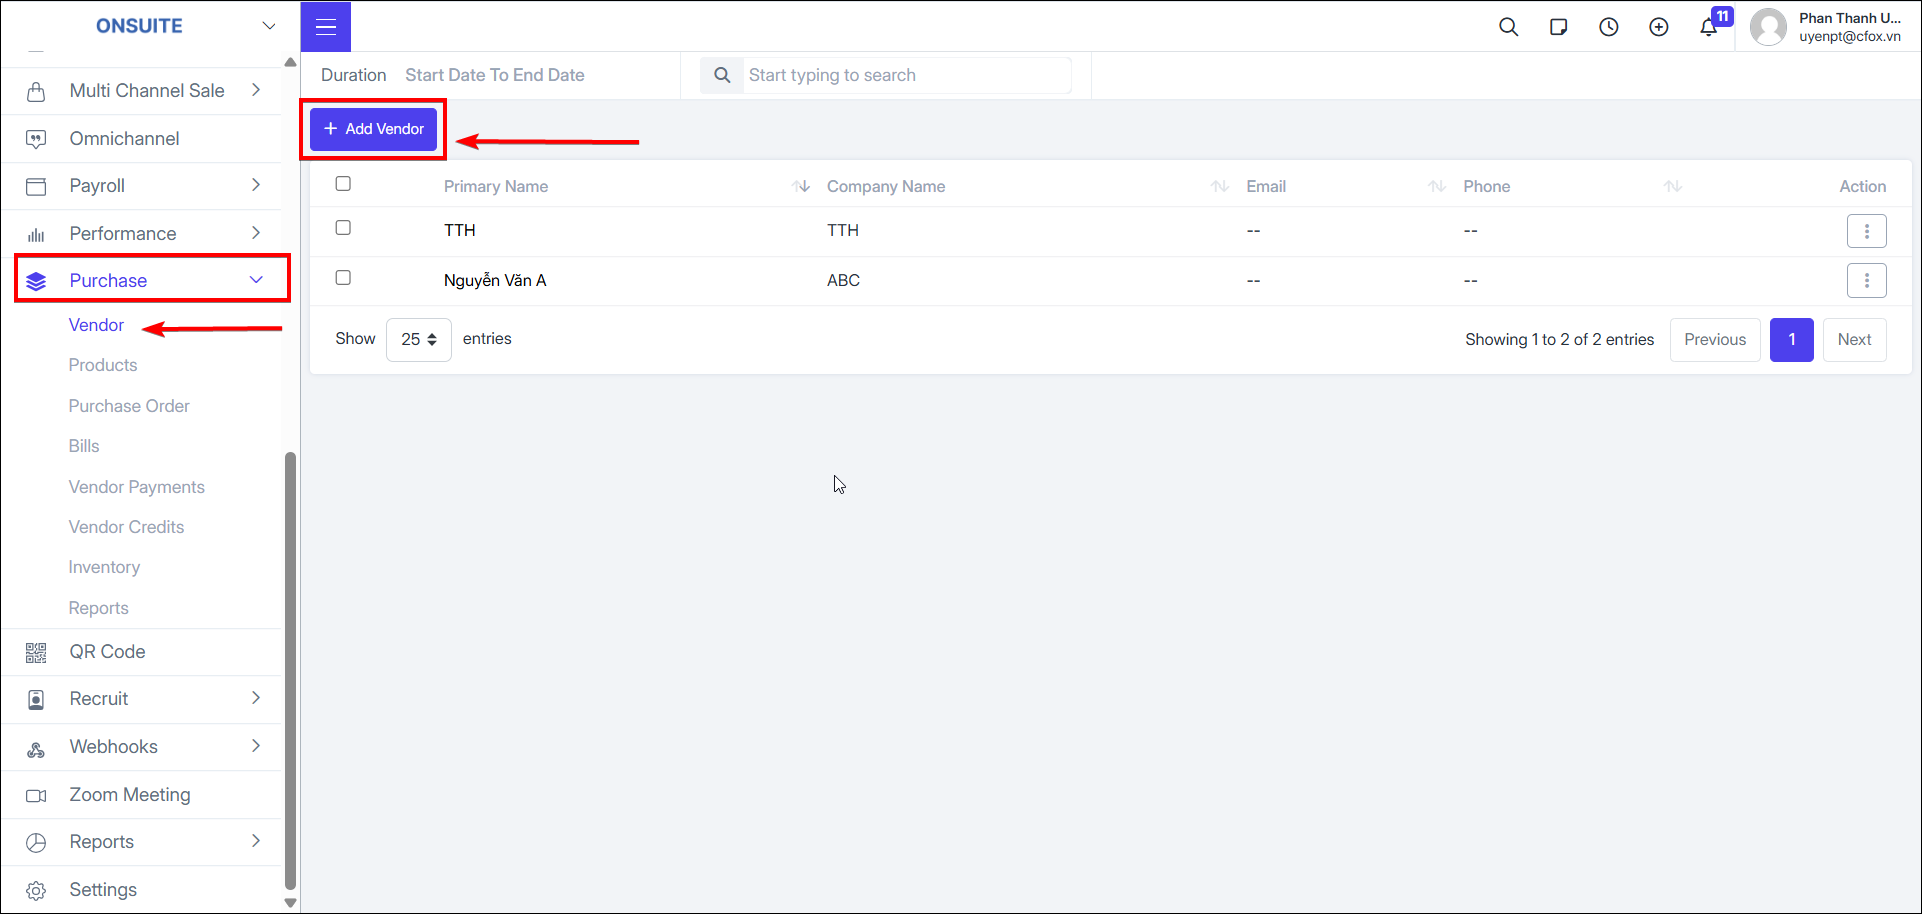
Add Vendor:
- Select to add new vendor

-
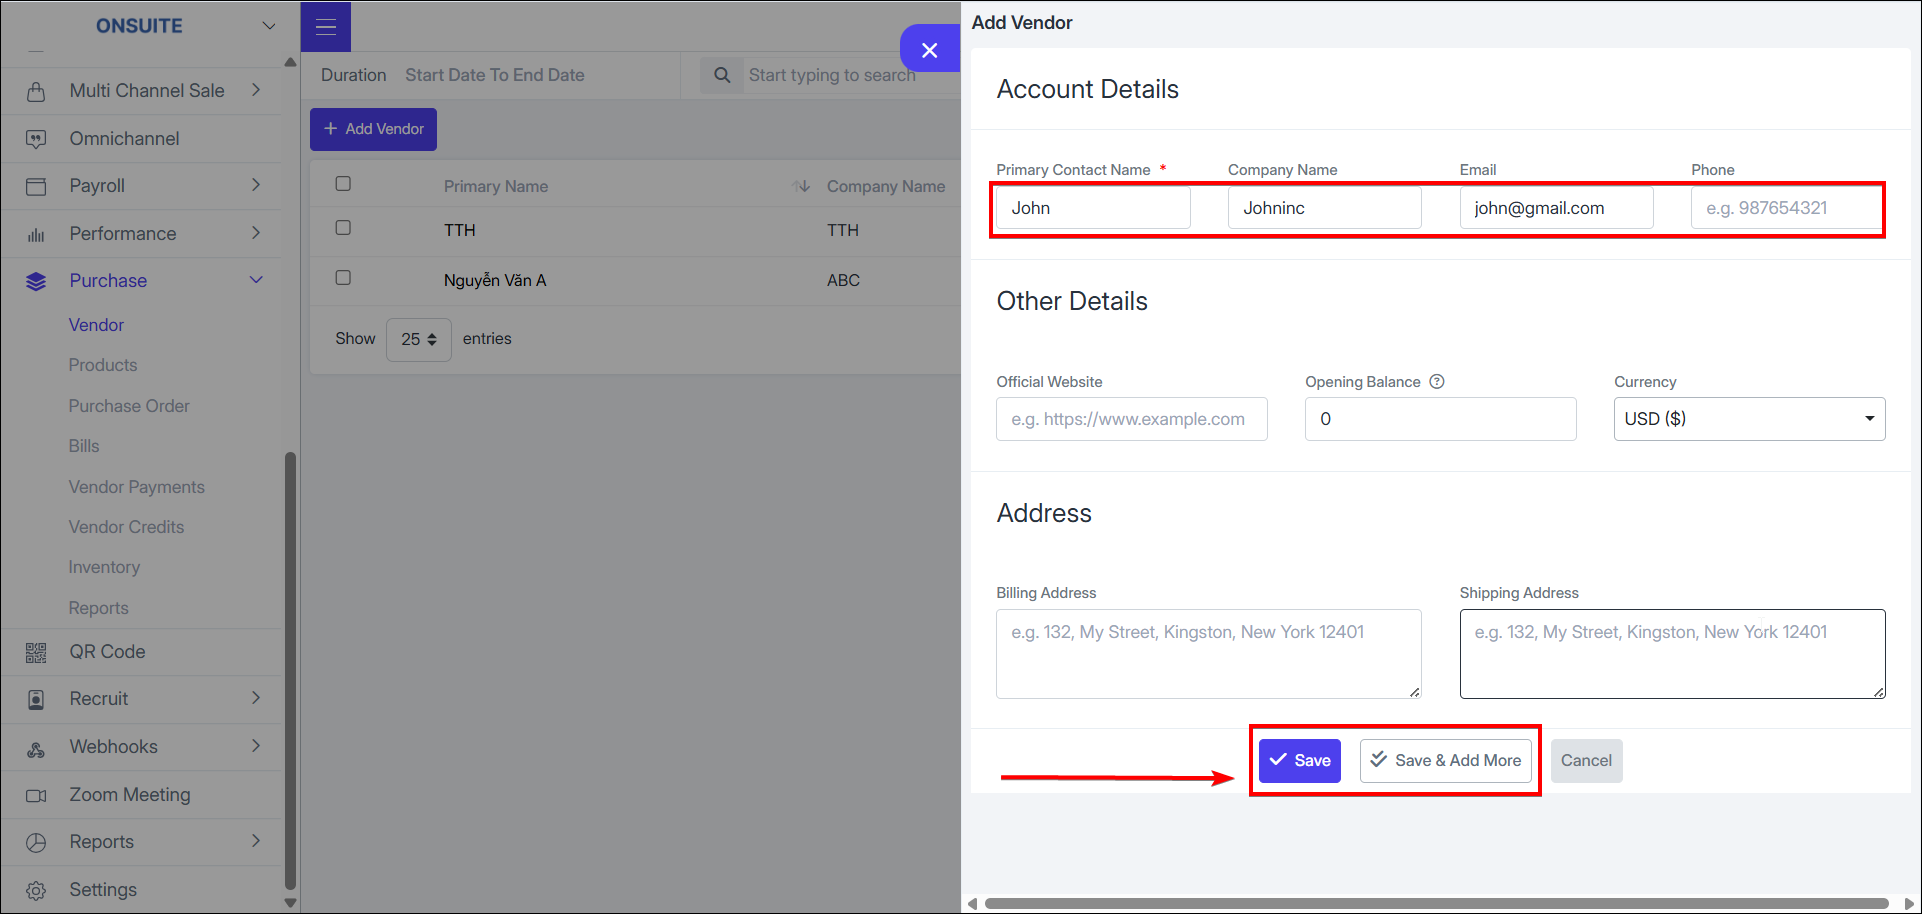
Fill in vendor information (Contact person, company, phone, email, address, etc.)
-
Select to save new vendor

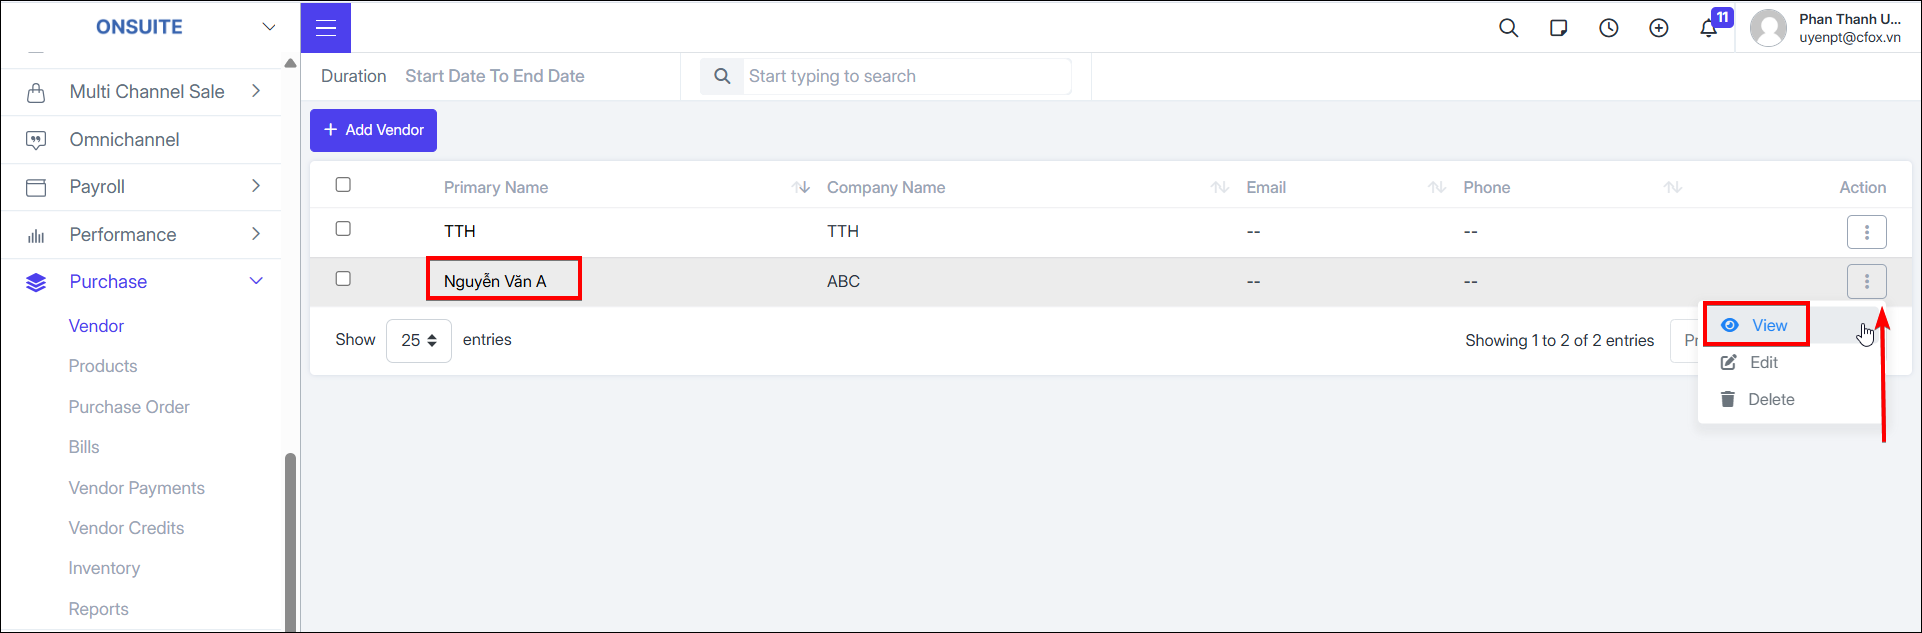
- View vendor: Select to view vendor details

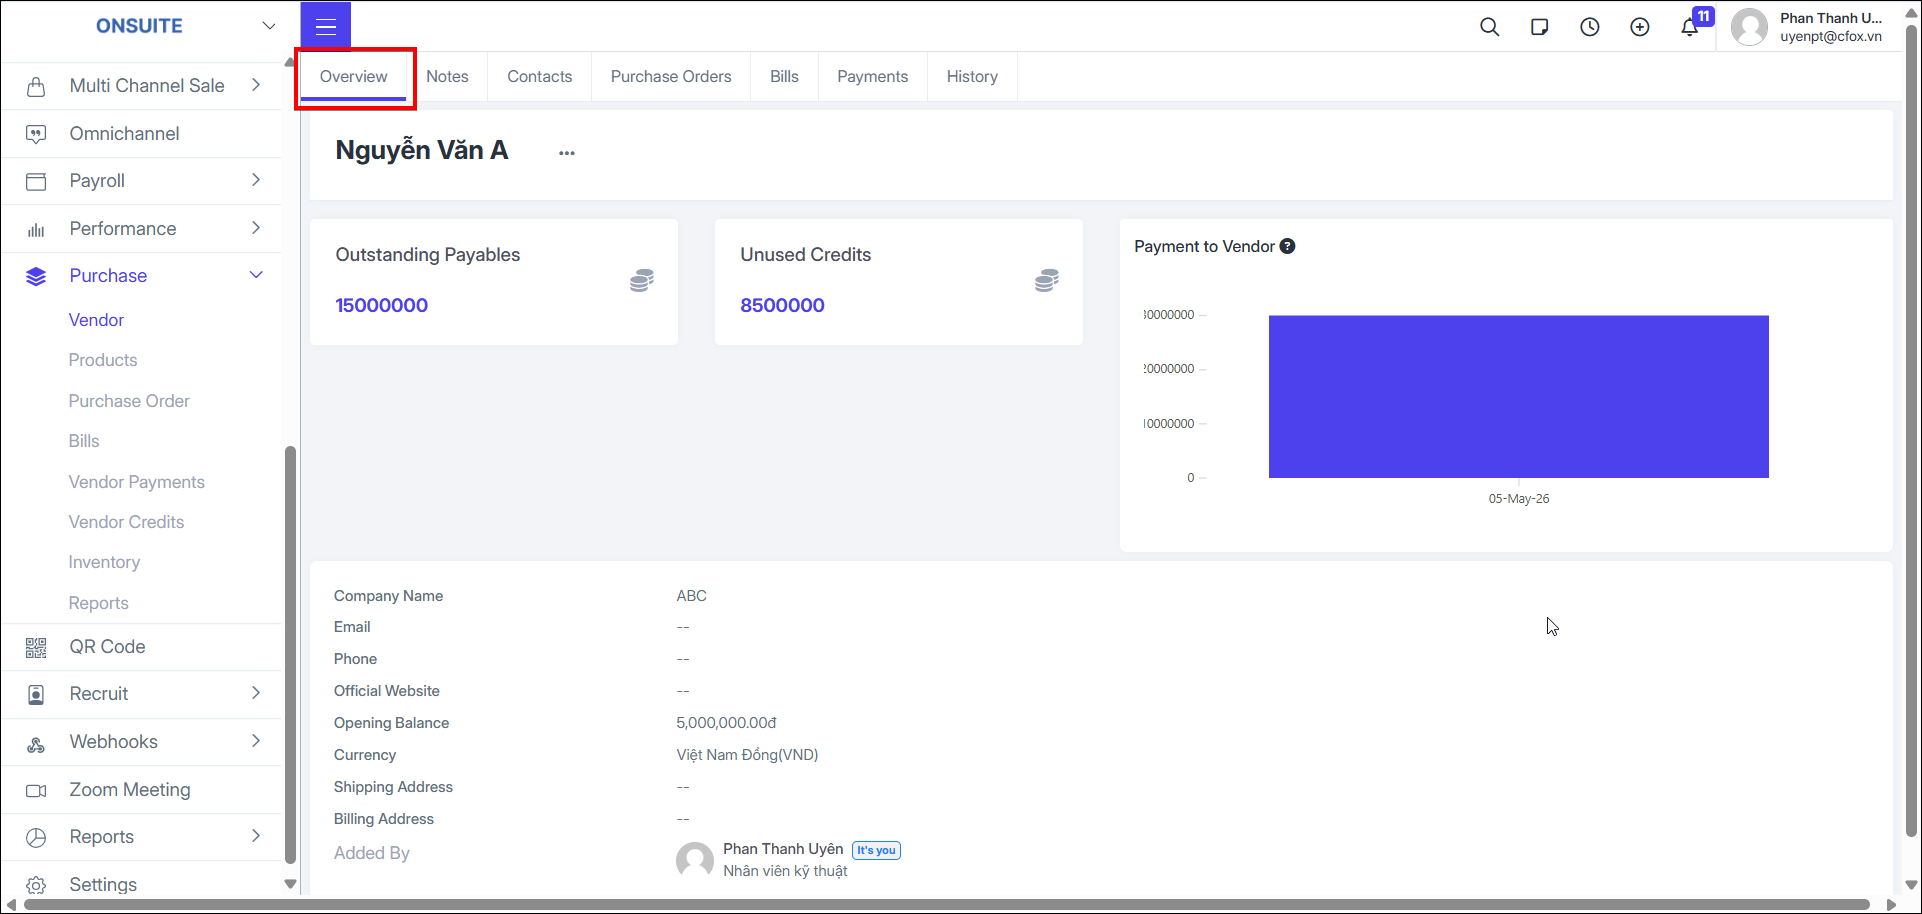
- Overview: Displays overview information of the vendor and cost items related to the vendor
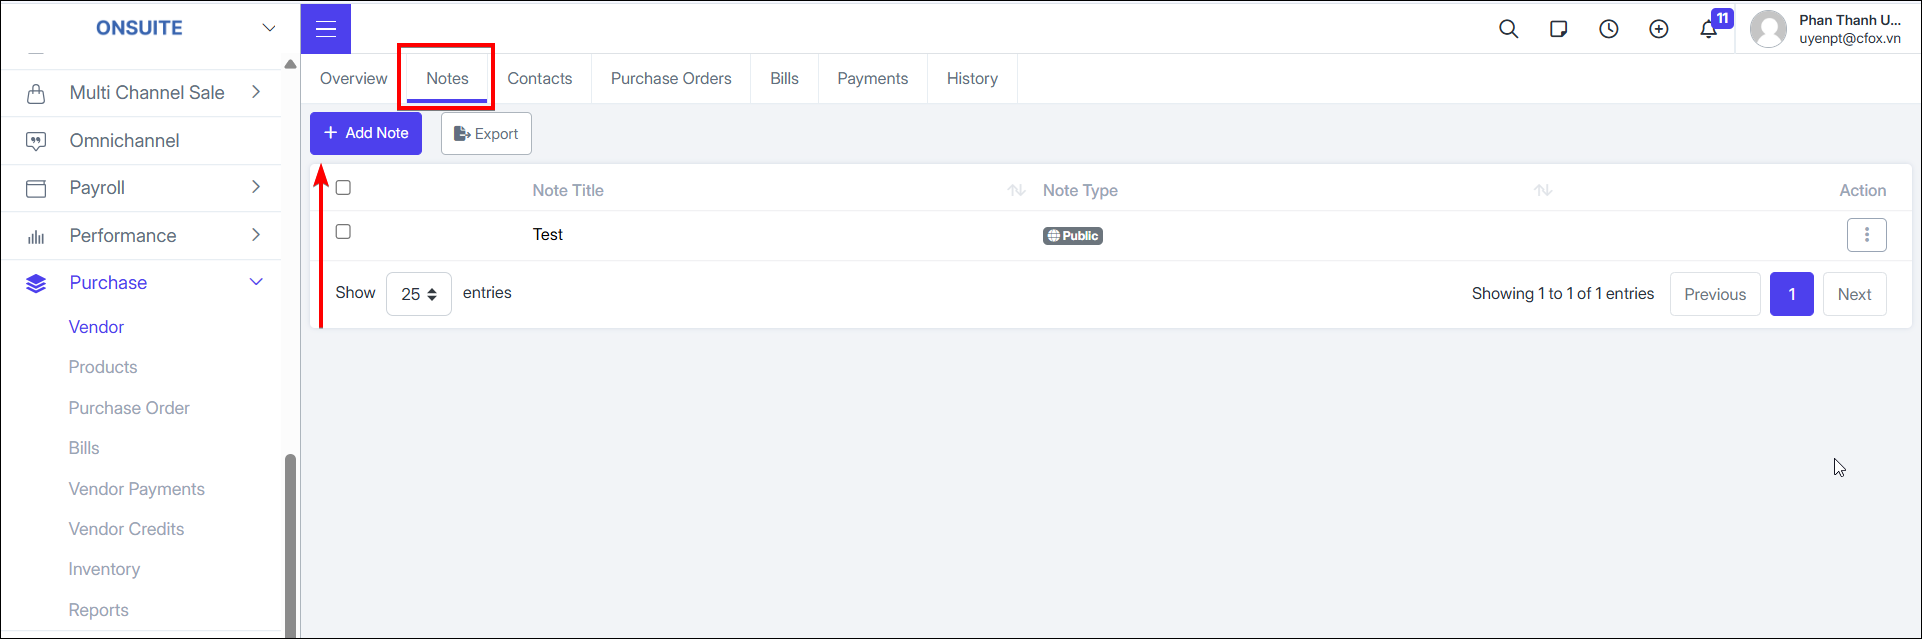
Notes:
Create notes related to the vendor
- Add note
-
Select to add note

-
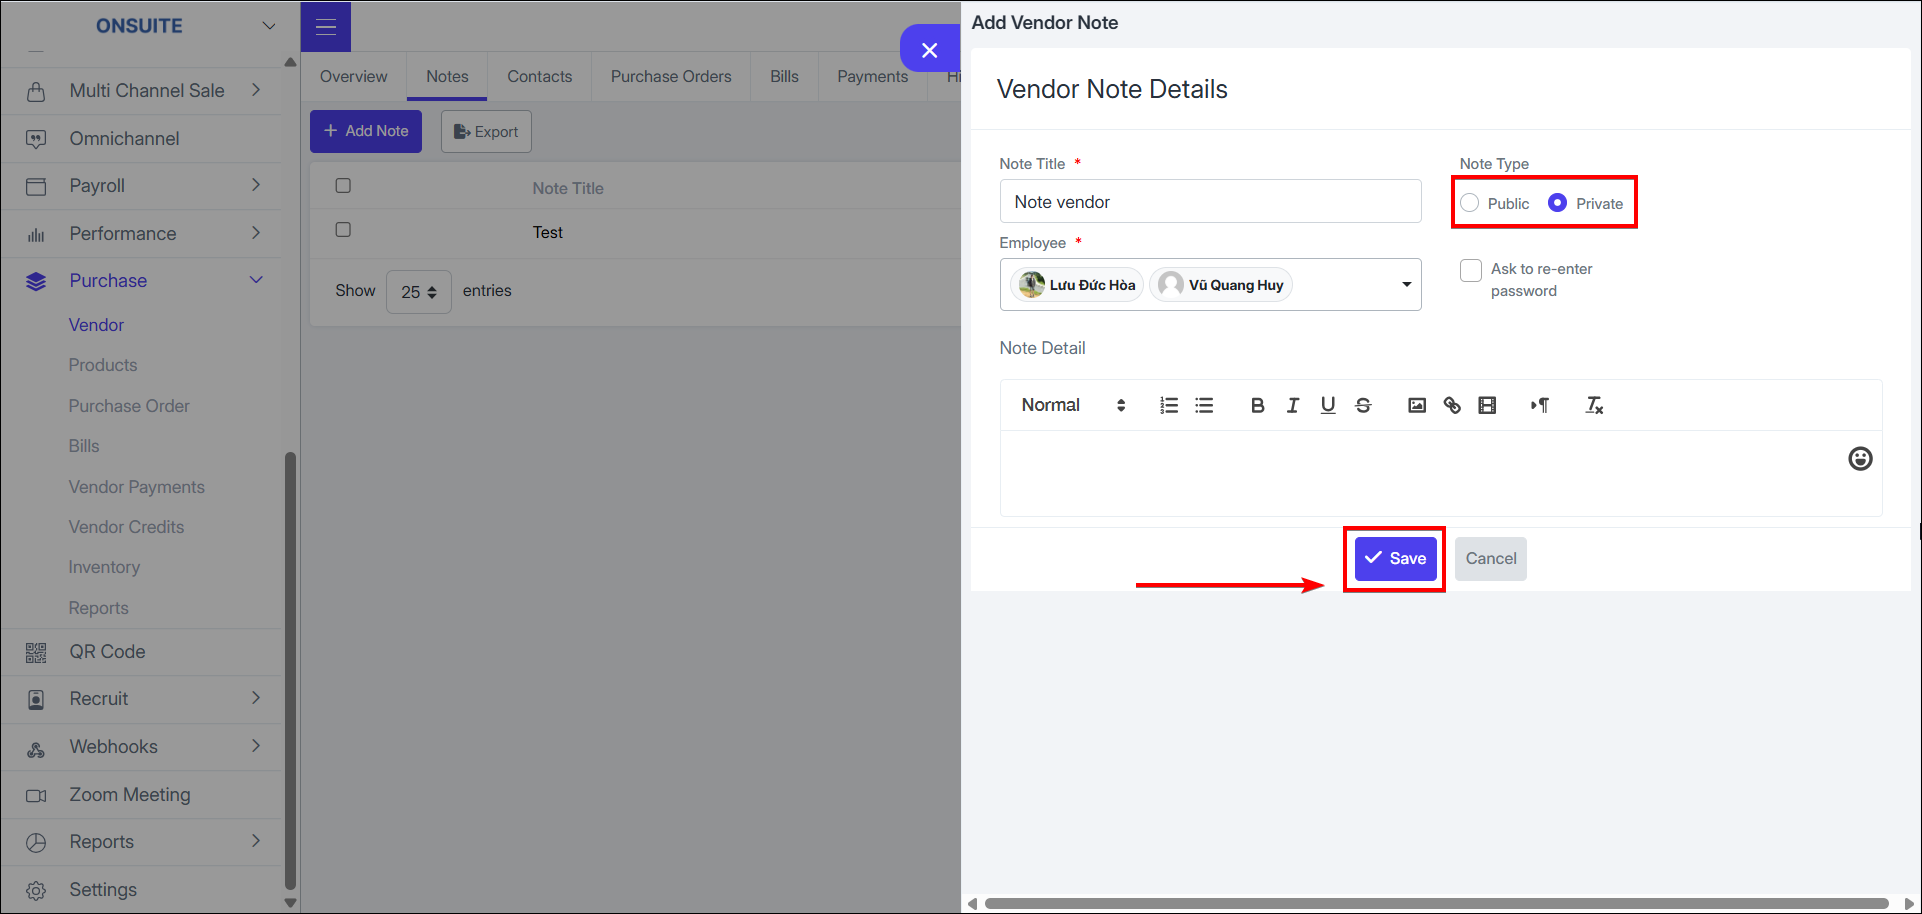
Enter title, select note type, and fill in note content
-
Select to save the note
-
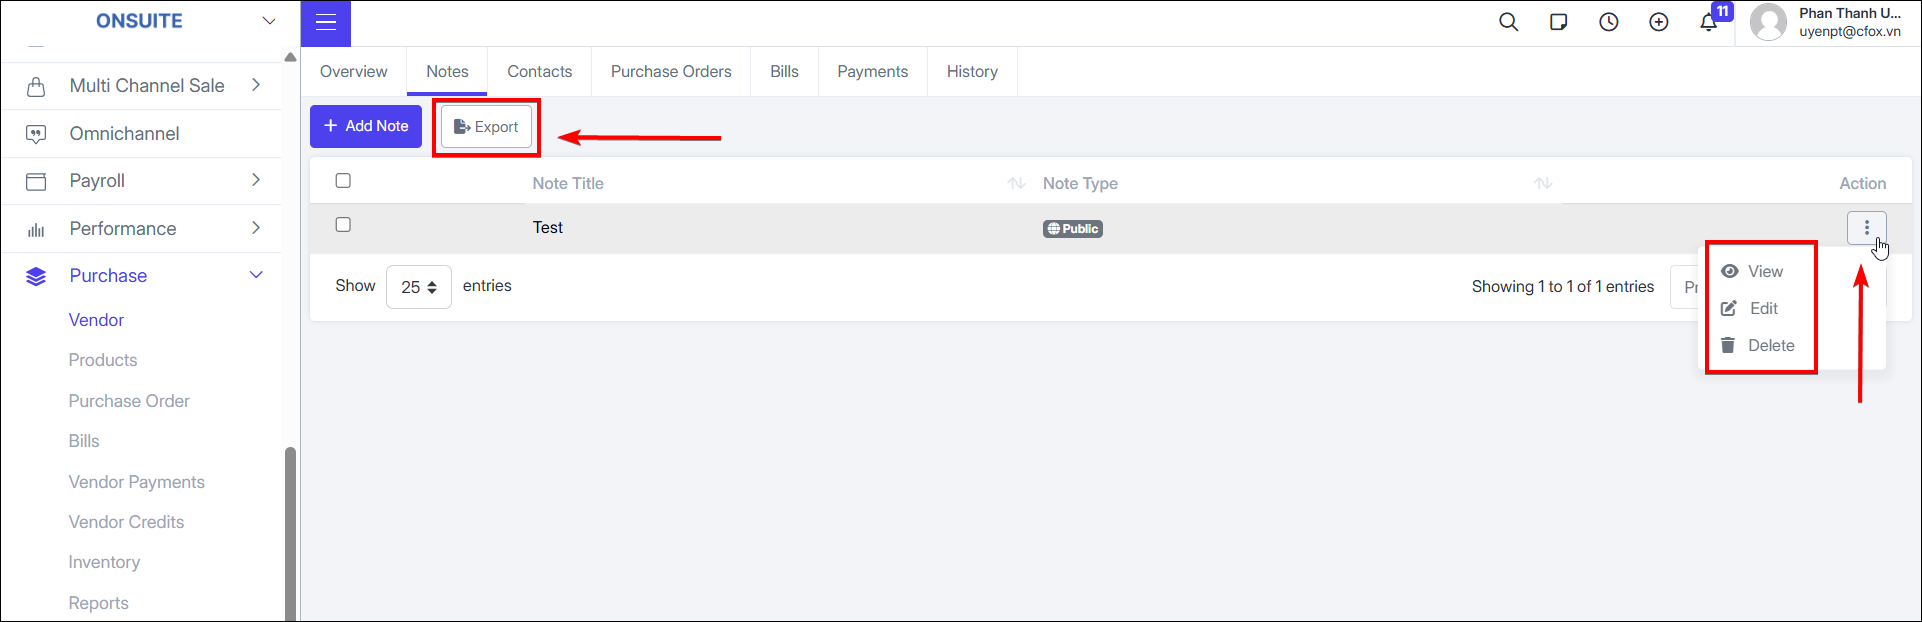
Note actions:
-
Select to view note details

-
Select to edit note

-
Select to delete note

-
Export to Excel: Select to export notes to Excel

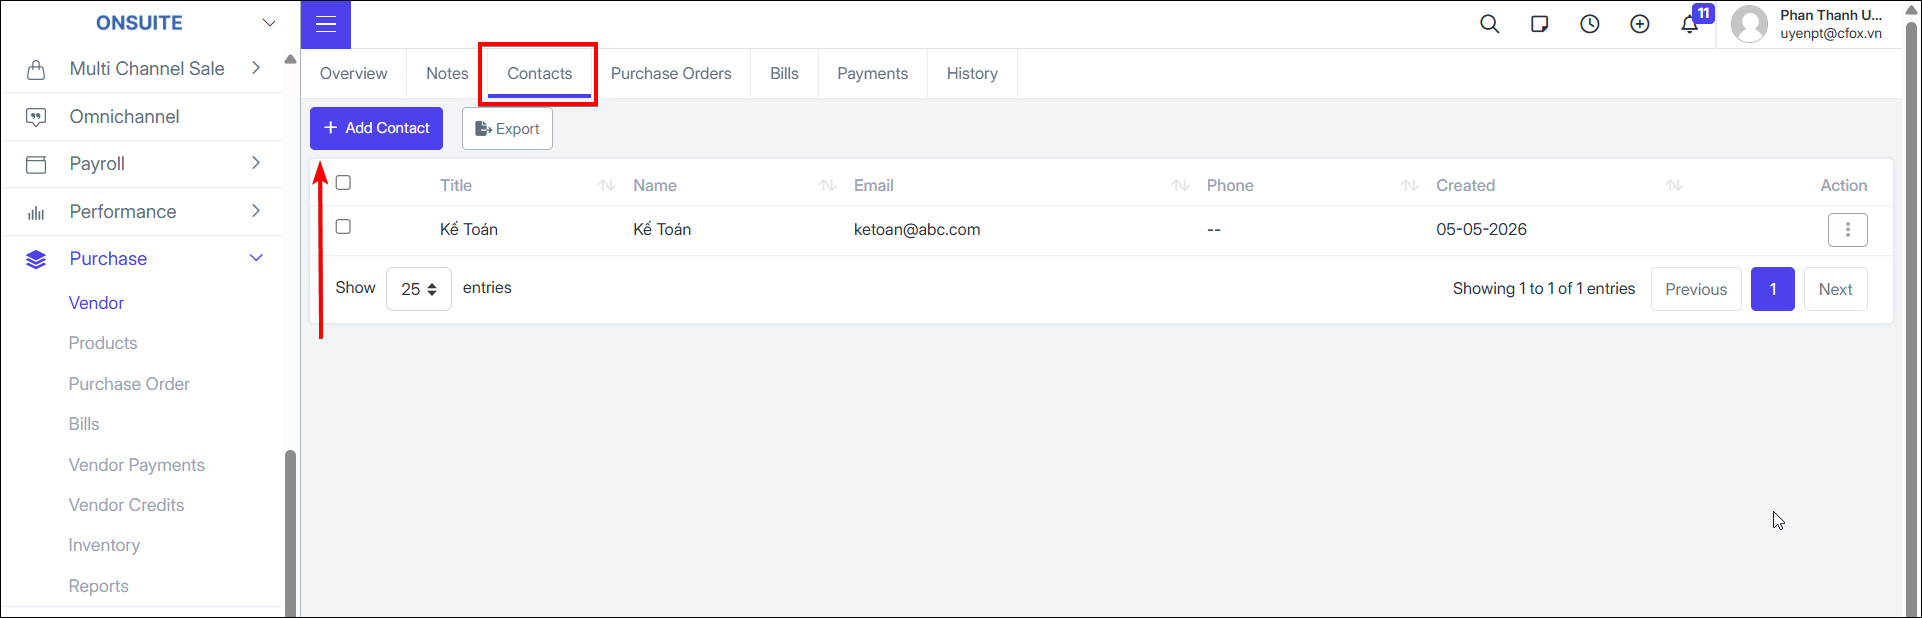
Contacts:
Manage vendor contacts (e.g. accounting, sales, etc.)
-
Add contact
-
Select to add new contact

-
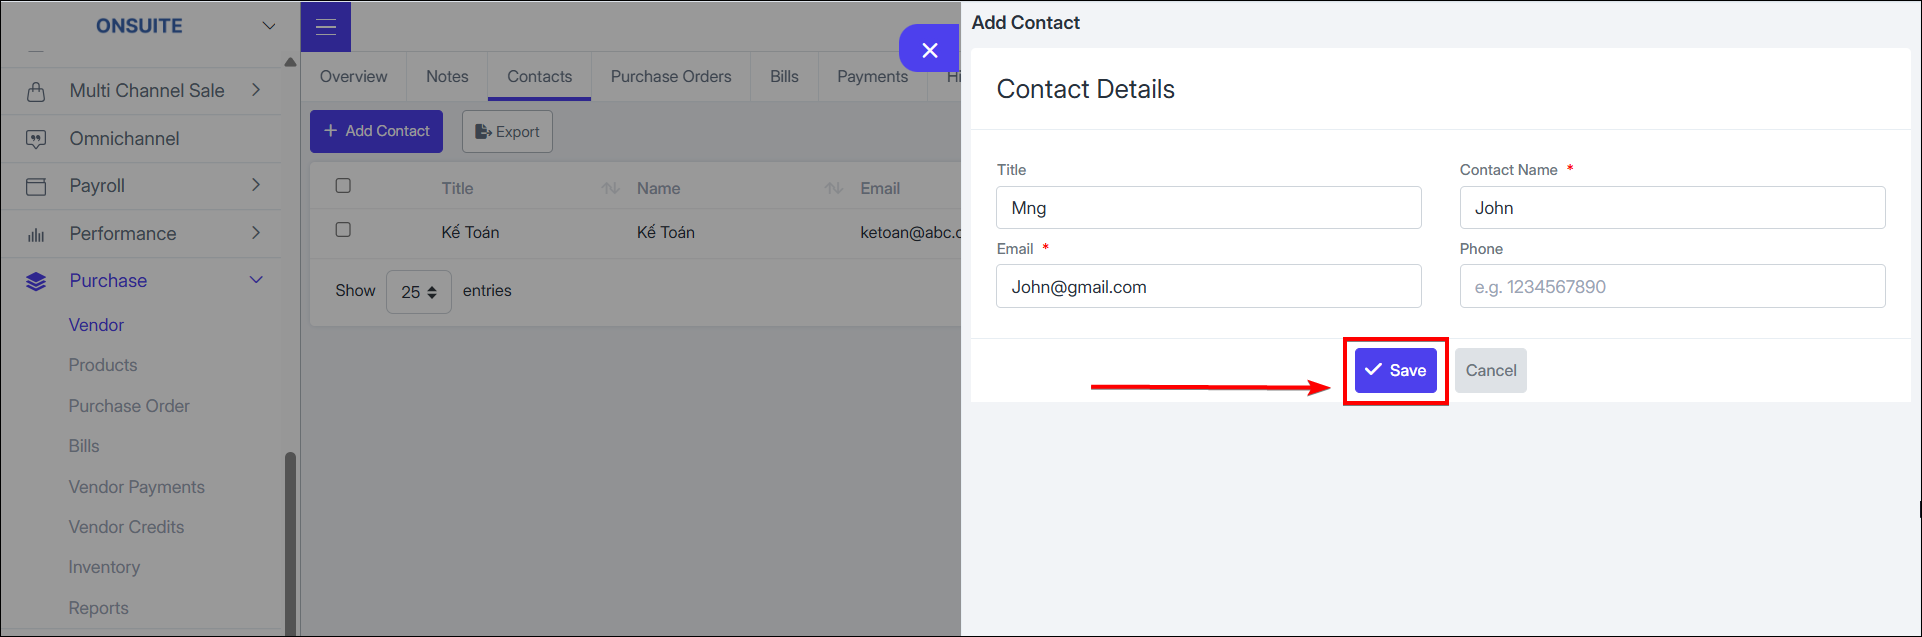
Fill in contact information: Full name, designation, phone, email (Name and email are required)
-
Select to save and create new contact
-
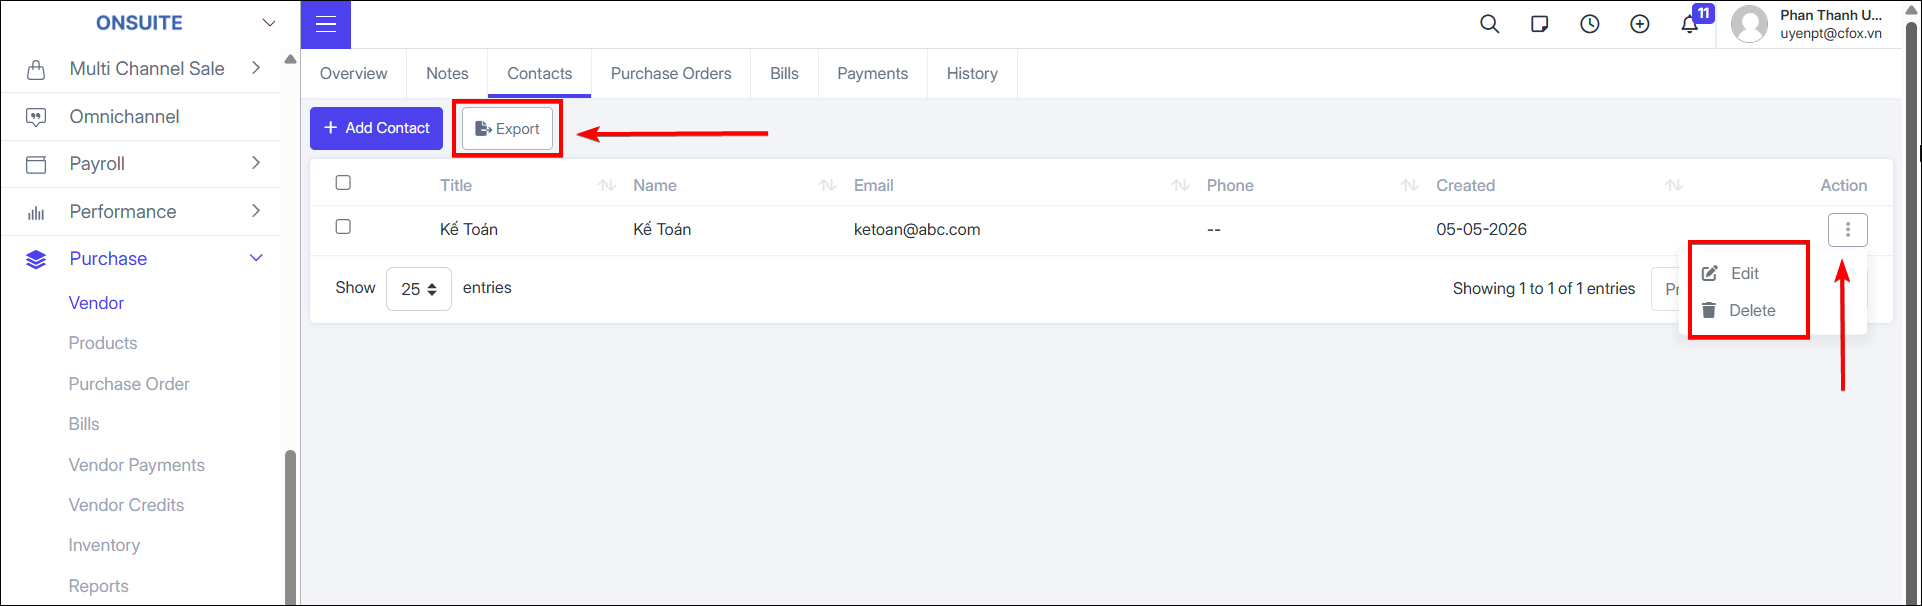
Contact actions:
-
Select to edit contact information, make changes, then select to update
-
Select to delete contact information, then confirm deletion
-
Export to Excel: Select to export vendor contact information to Excel
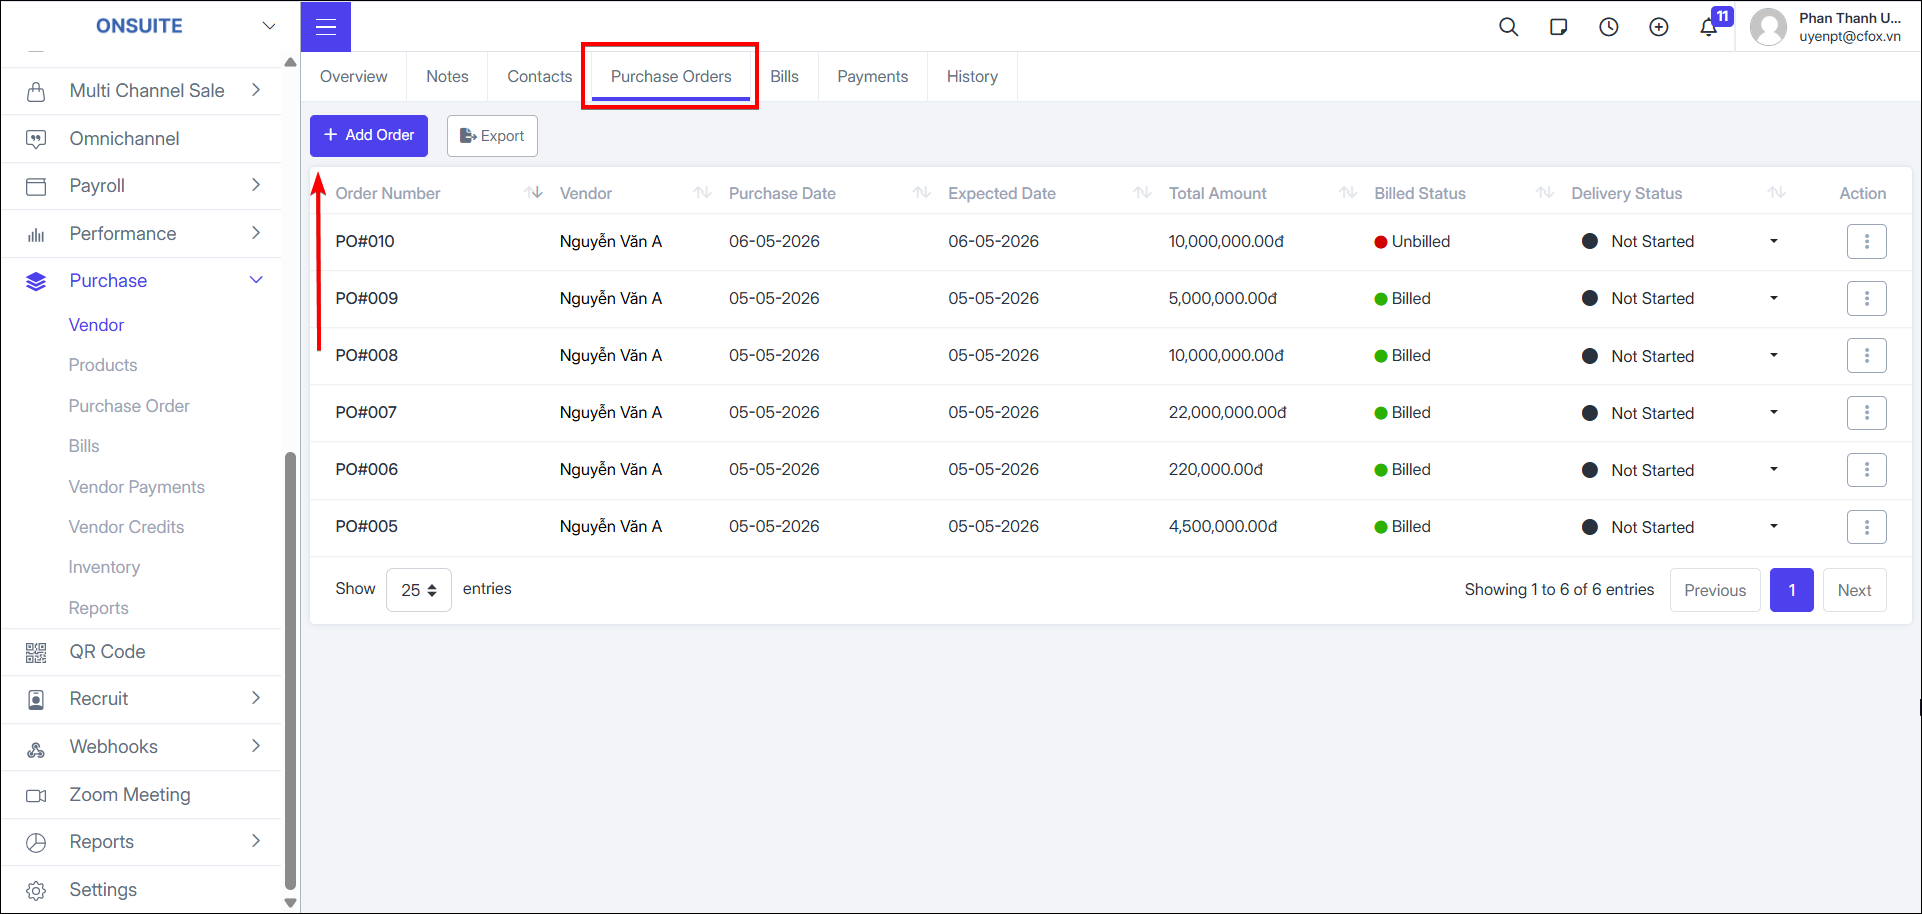
Purchase Orders:
Manage purchase orders with the vendor
-
Create new purchase order
-
Select to create new purchase order

-
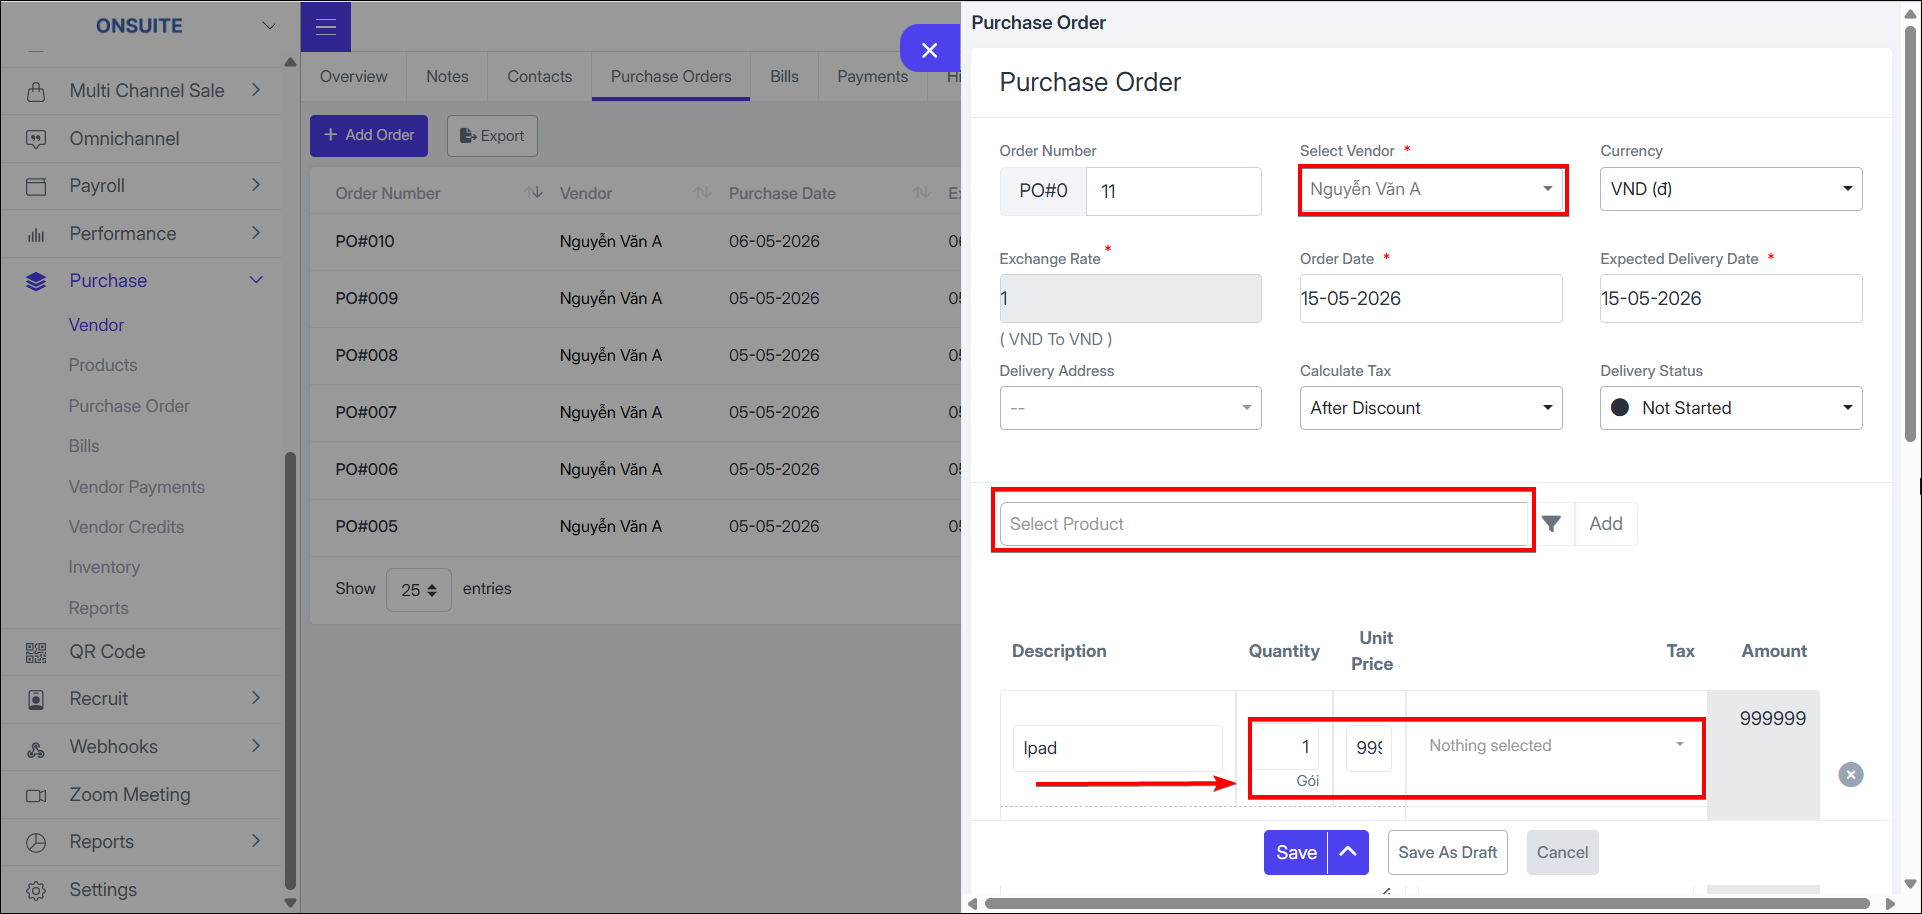
Fill in order information:
-
General info: Order date, expected delivery date, tax calculation method, shipping address, etc.
-
Product information: Add products, enter quantity, price, tax
-
Other information: discount, notes, etc.
-
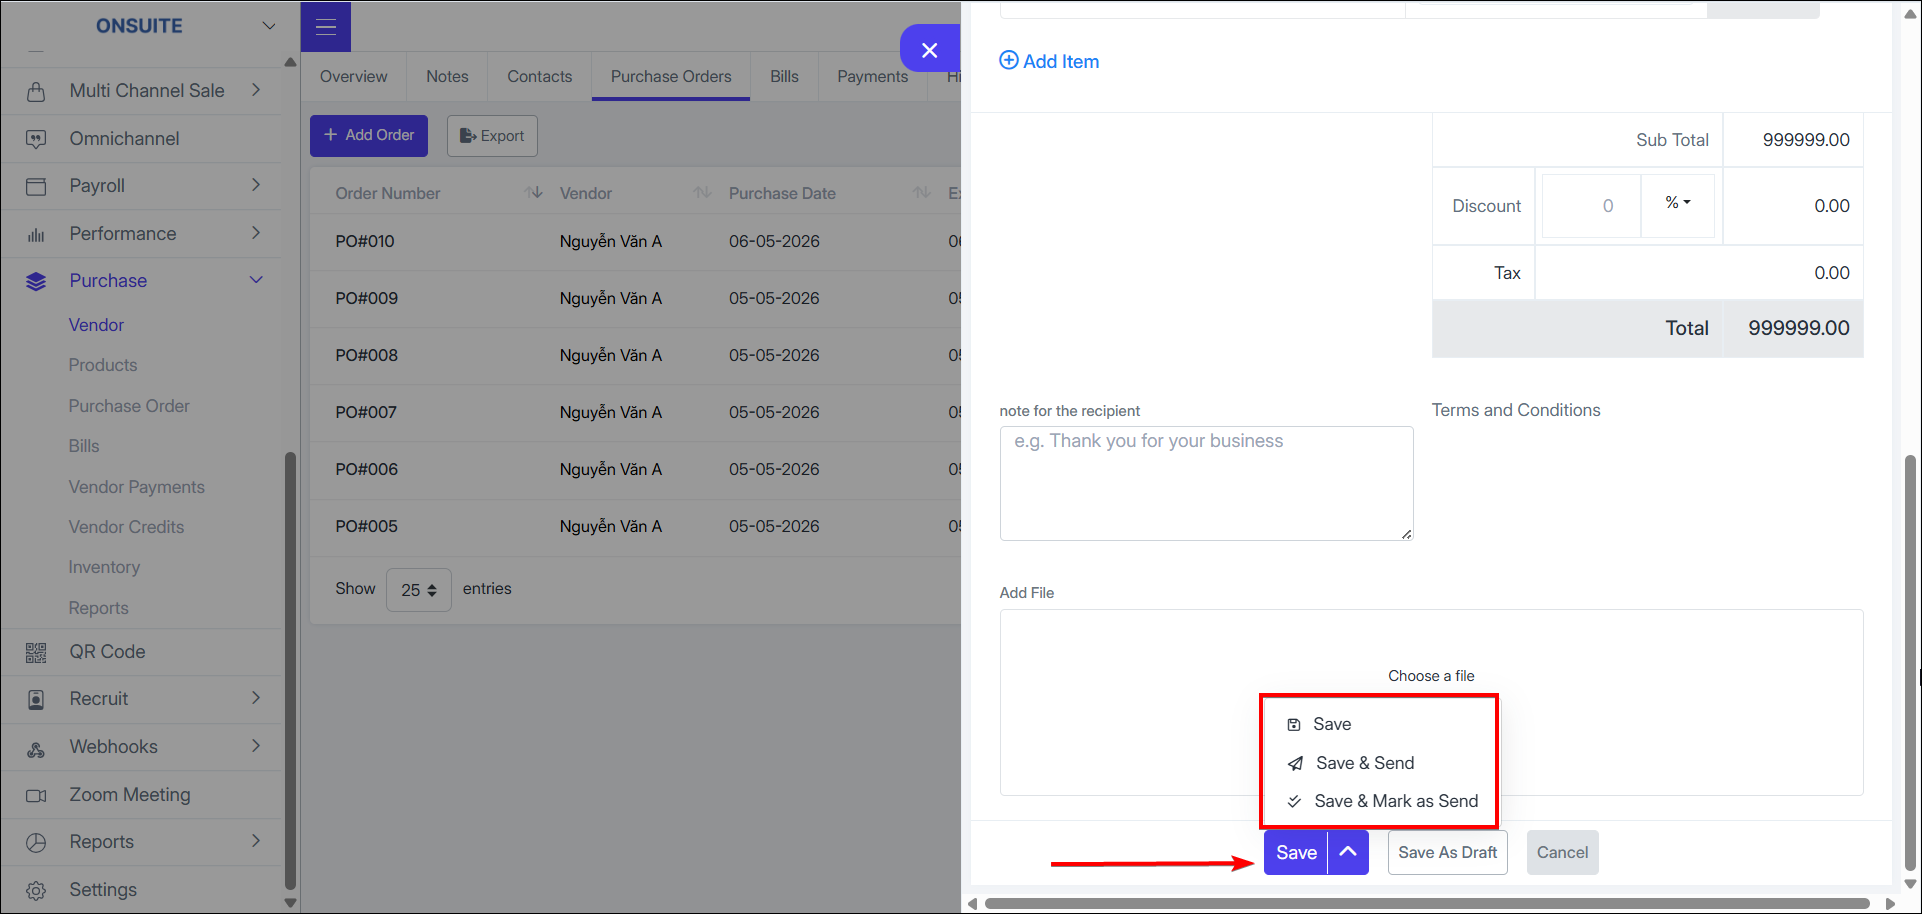
Order save options:
-
Select to save the purchase order

-
Select to save and send order information to the vendor

-
Select to save and mark order as sent to vendor

-
Select to save as draft

-
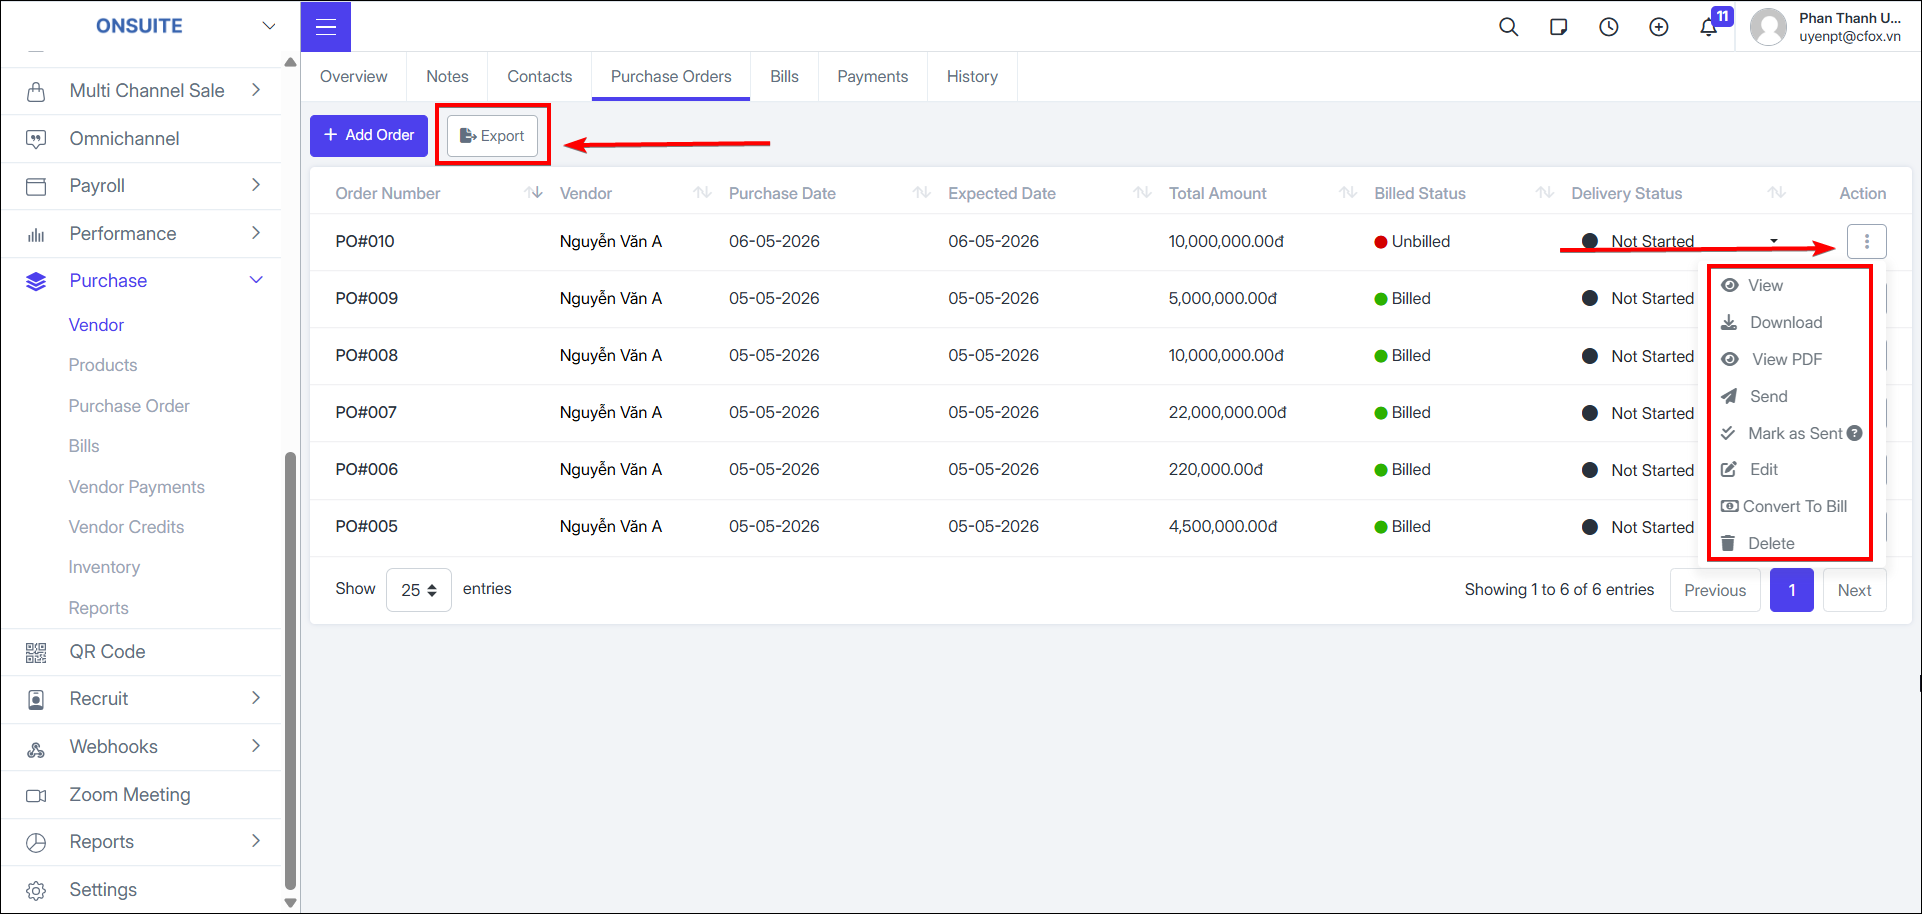
Purchase order actions:
-
View: select to view order details
-
Download: select to download order PDF

-
View PDF: select to view order as PDF
-
Send: select to send order to vendor

-
Mark as sent: select to mark order status as sent to vendor

-
Edit: select to edit order information

-
Convert to Bill: select to convert order to Bill, customize Bill details and save (two save options: draft or open)

-
Delete: select to delete the order, then confirm

-
Export to Excel: Select to export order information to Excel

Bills:
-
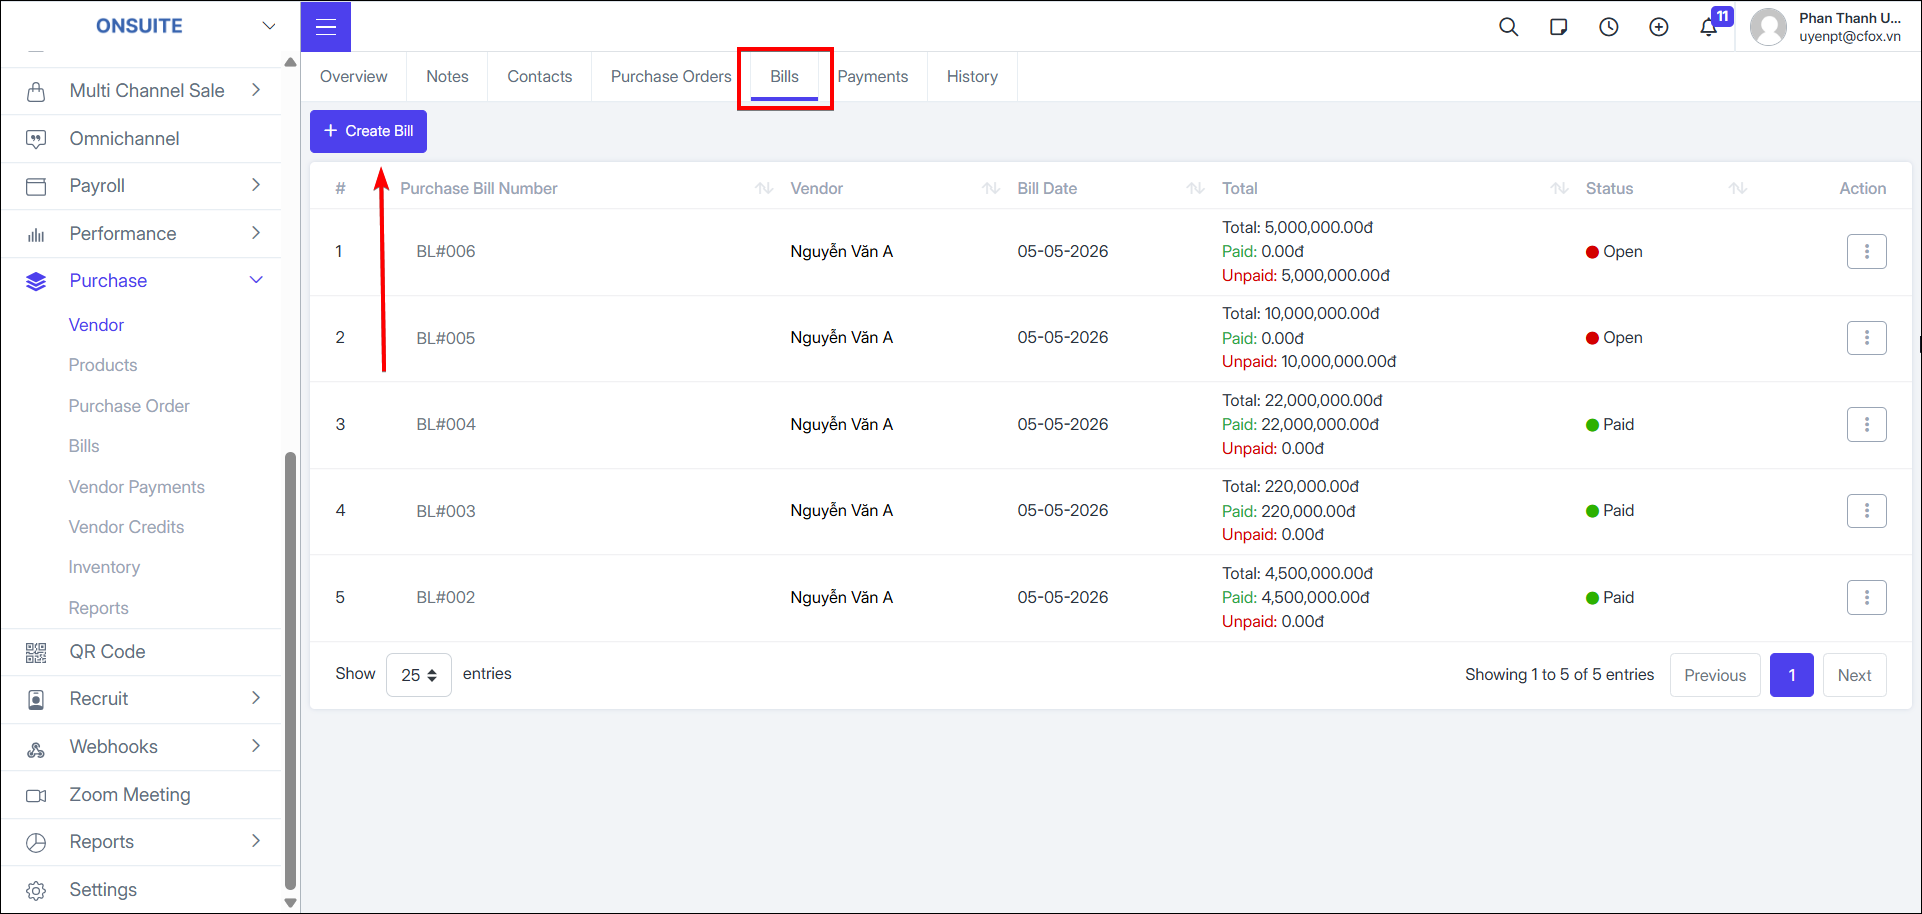
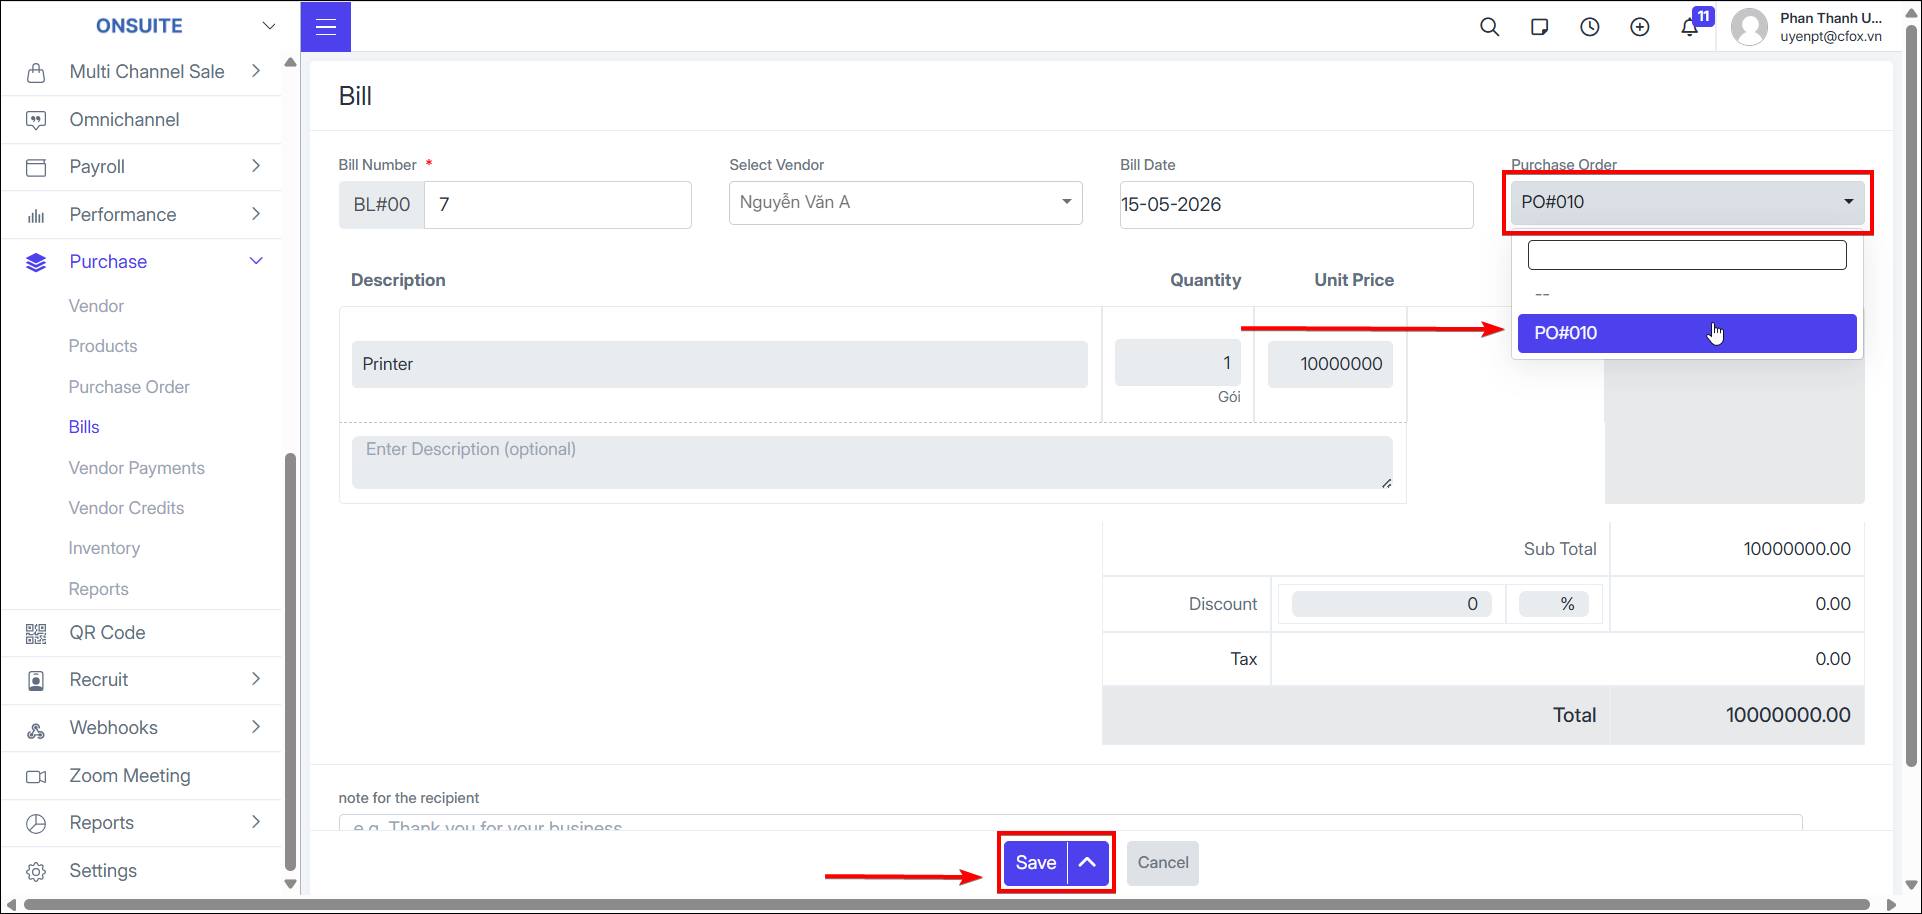
Create Bill
-
Select to create Bill

-
Fill in information: Bill number, Bill date, select purchase order, notes (if any)
-
Select to save Bill: two save options – draft and open

-
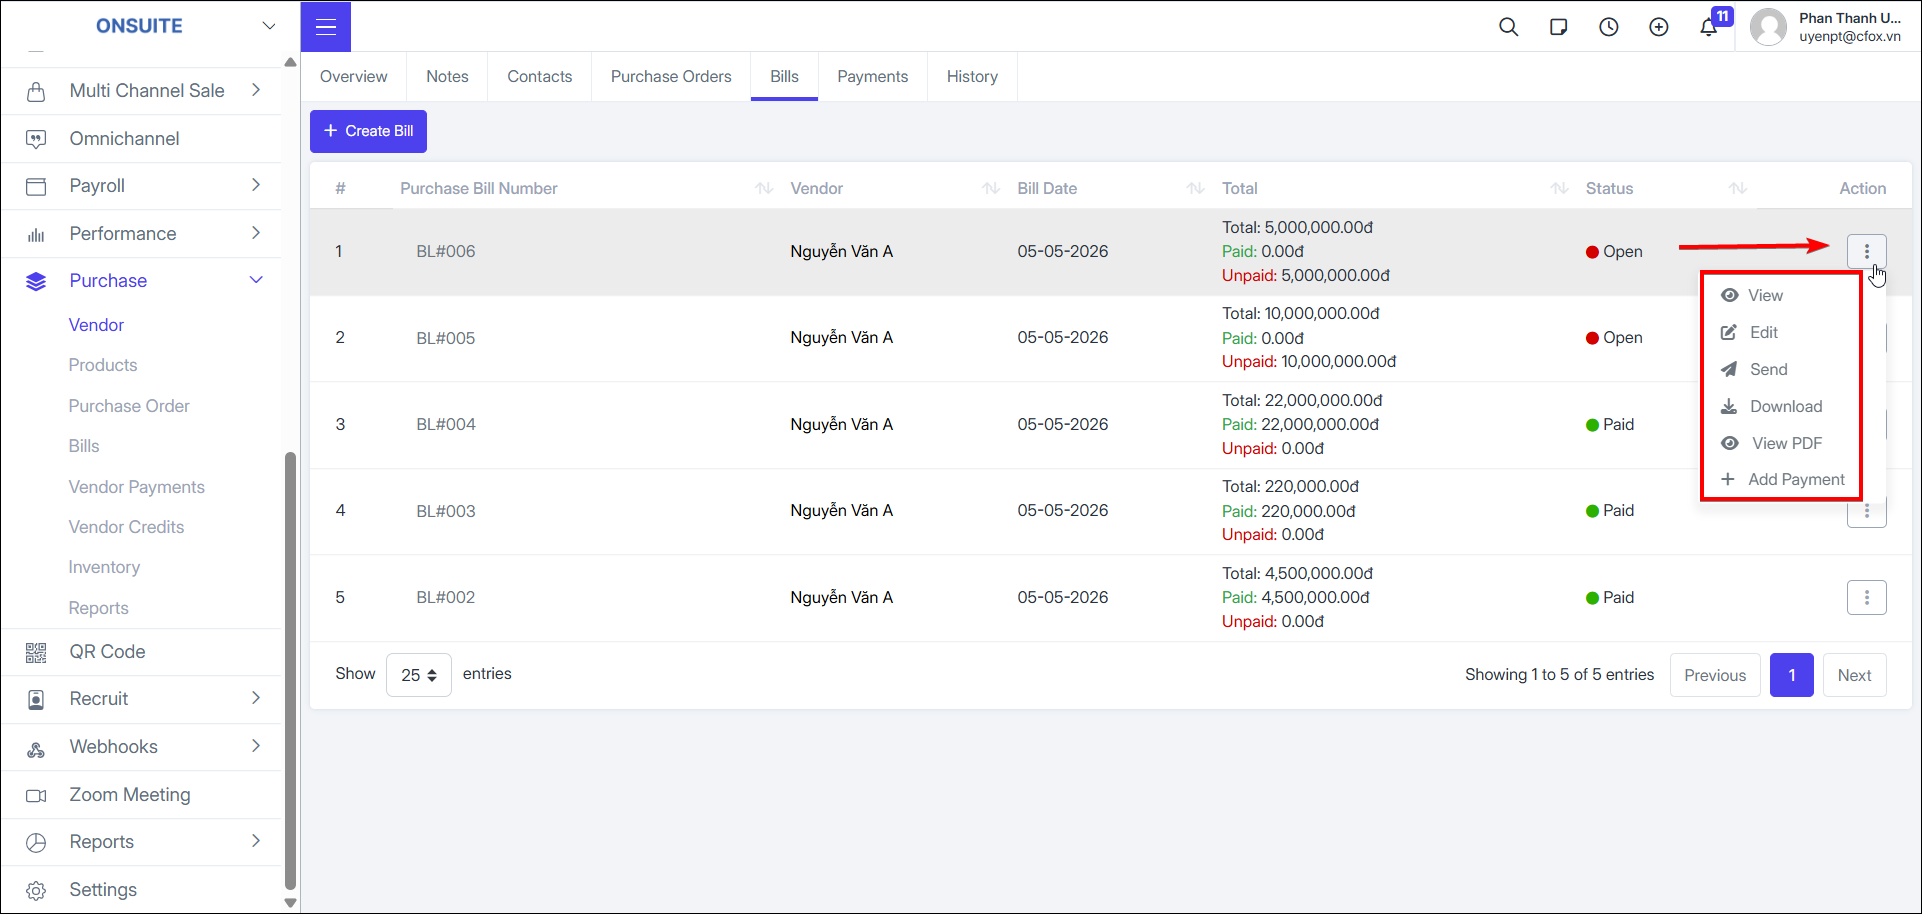
Bill actions:
-
View: select to view Bill details
-
Edit: select to edit Bill information, then save
-
Send: select to send Bill to vendor

-
Download: select to download Bill PDF

-
View PDF: select to view Bill as PDF
-
Add Payment: select to proceed to Bill payment

Payments:
-
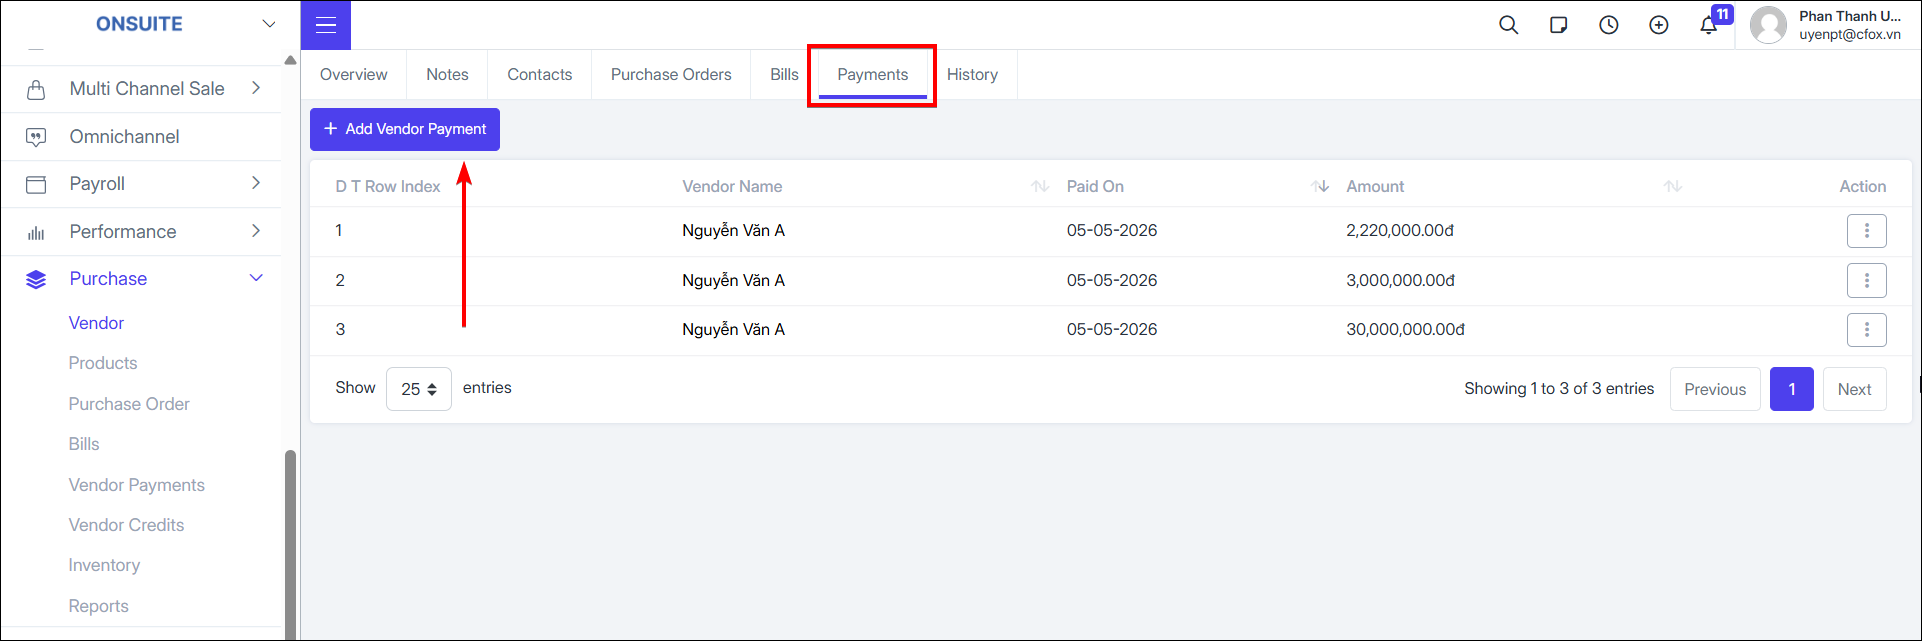
Create payment for vendor
-
Select to create payment for vendor

-
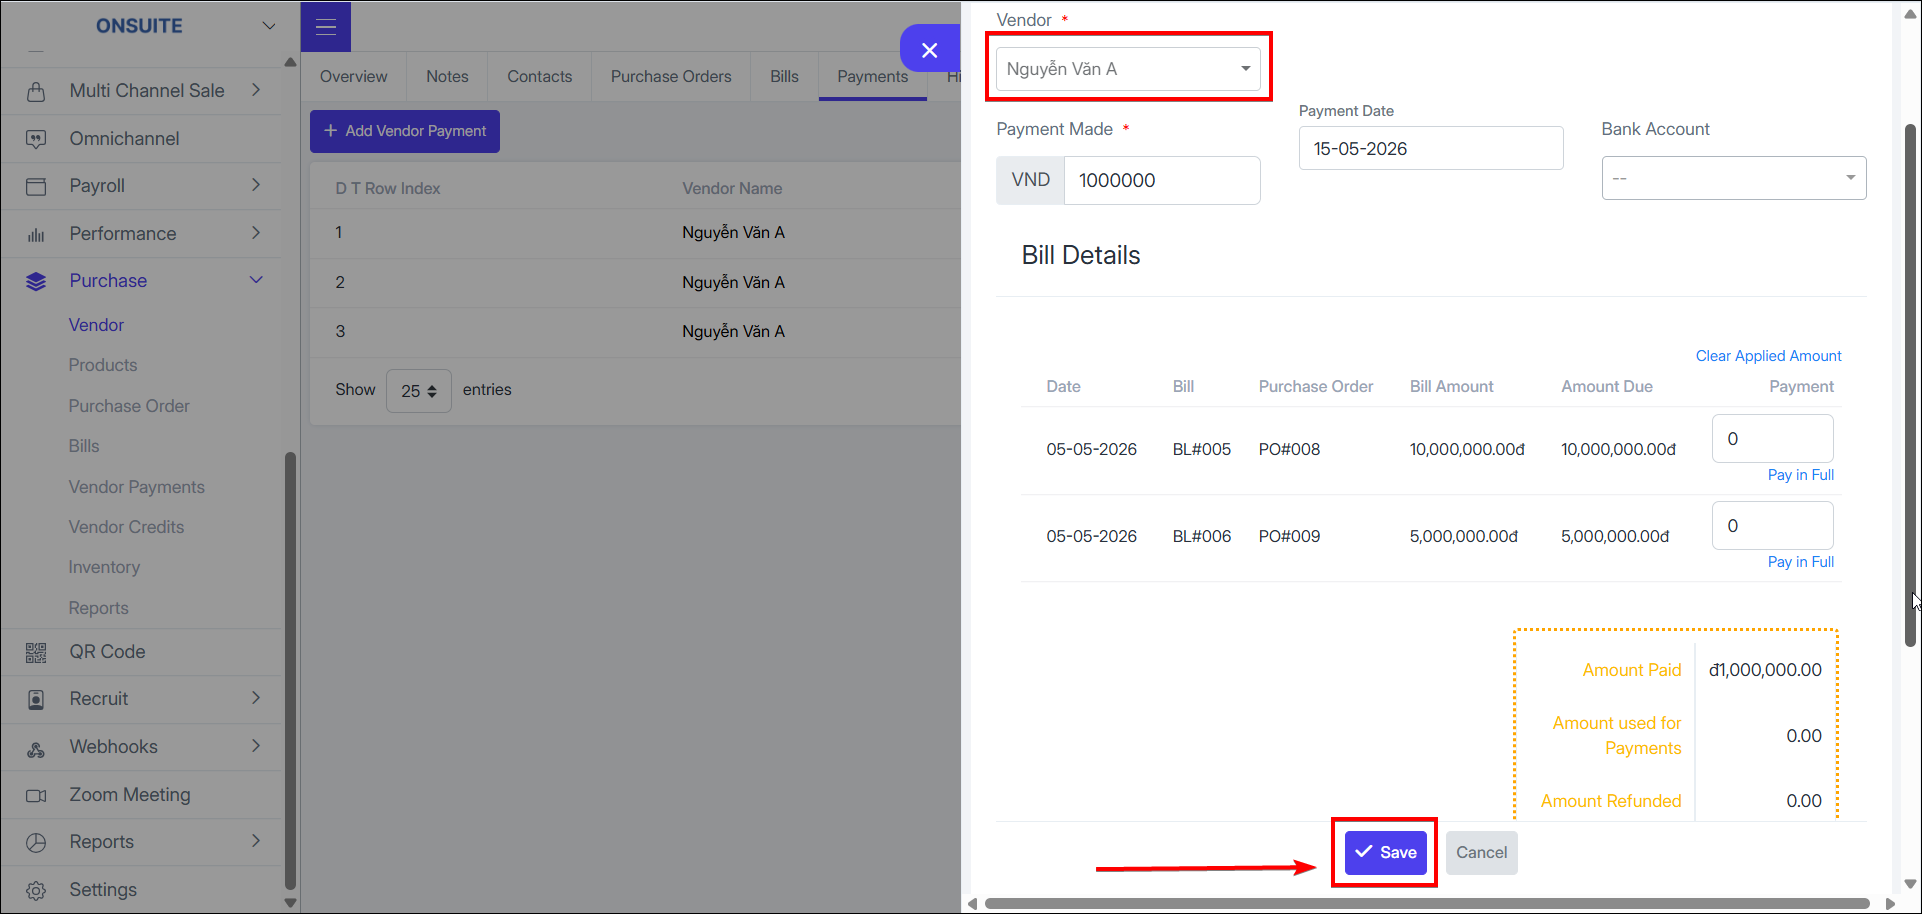
Fill in information:
-
Payment date, payment account, amount paid
-
Bill details will show Bills with 'Open' or 'Partially Paid' status – enter payment amount for vendor
-
Option to send information via email to vendor and add notes if any
-
Select to save vendor payment

-
After completing payment, Bill statuses will update based on amount paid: Partially Paid, Paid
-
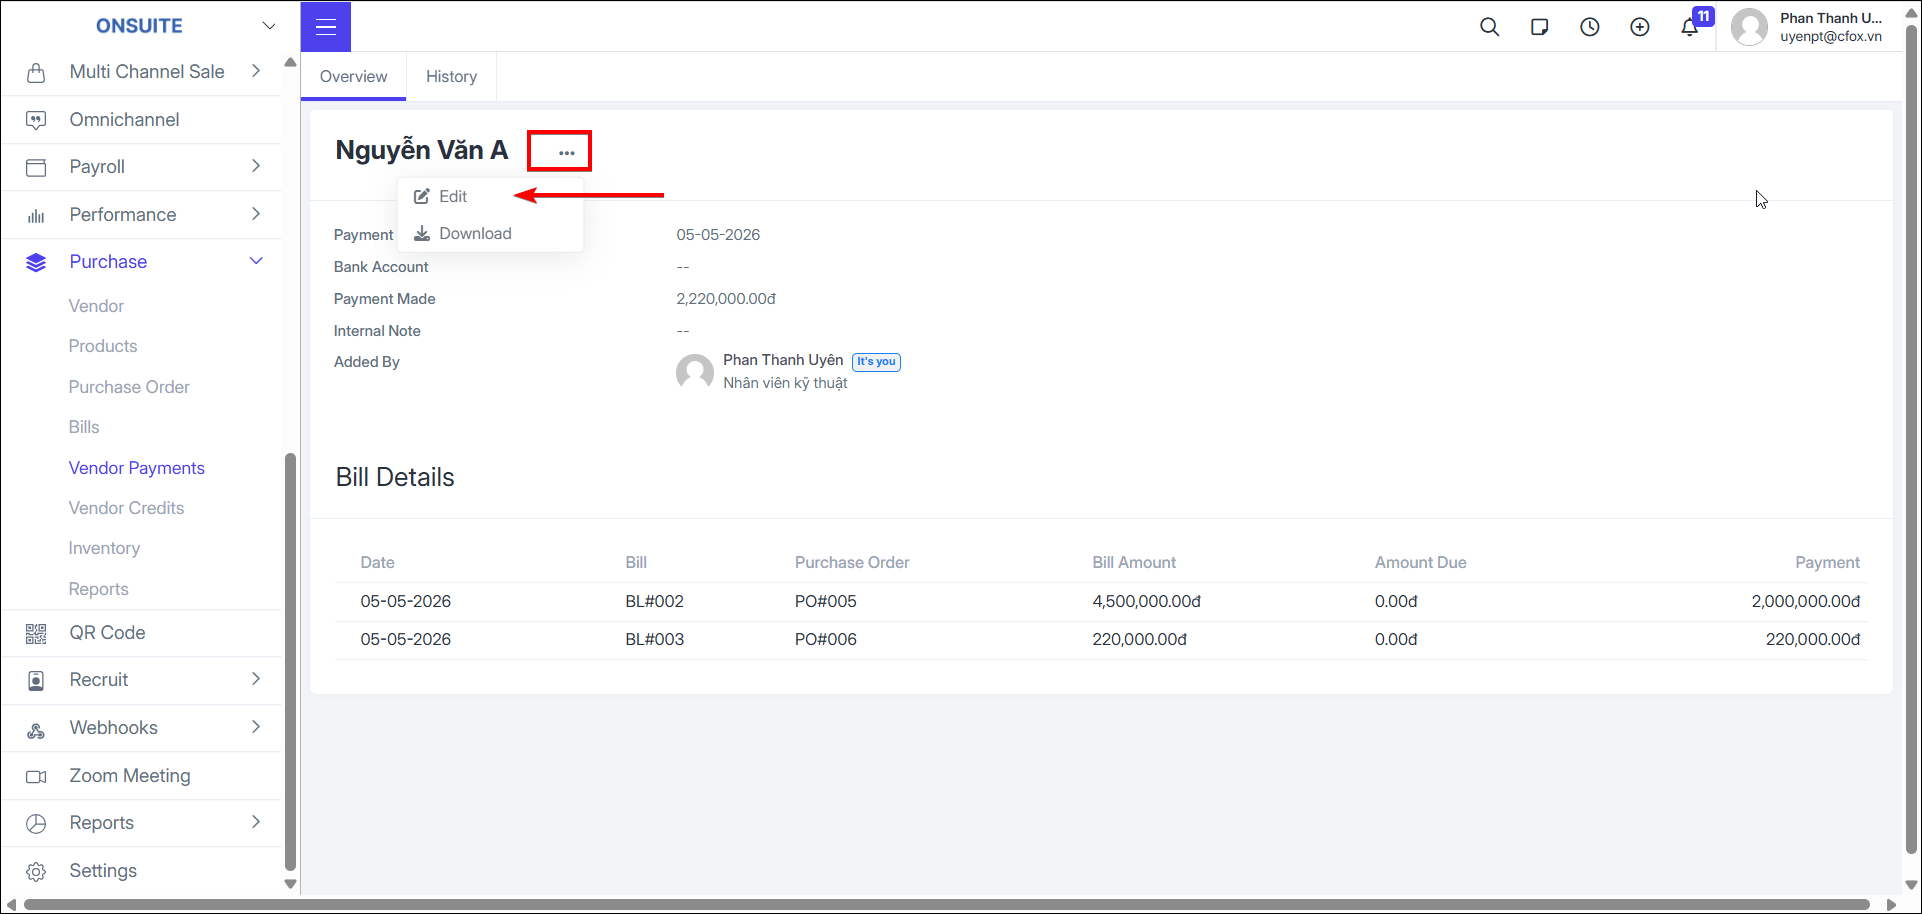
Payment actions:
-
View: Select to view vendor payment details

-
Download: Select to download vendor payment slip
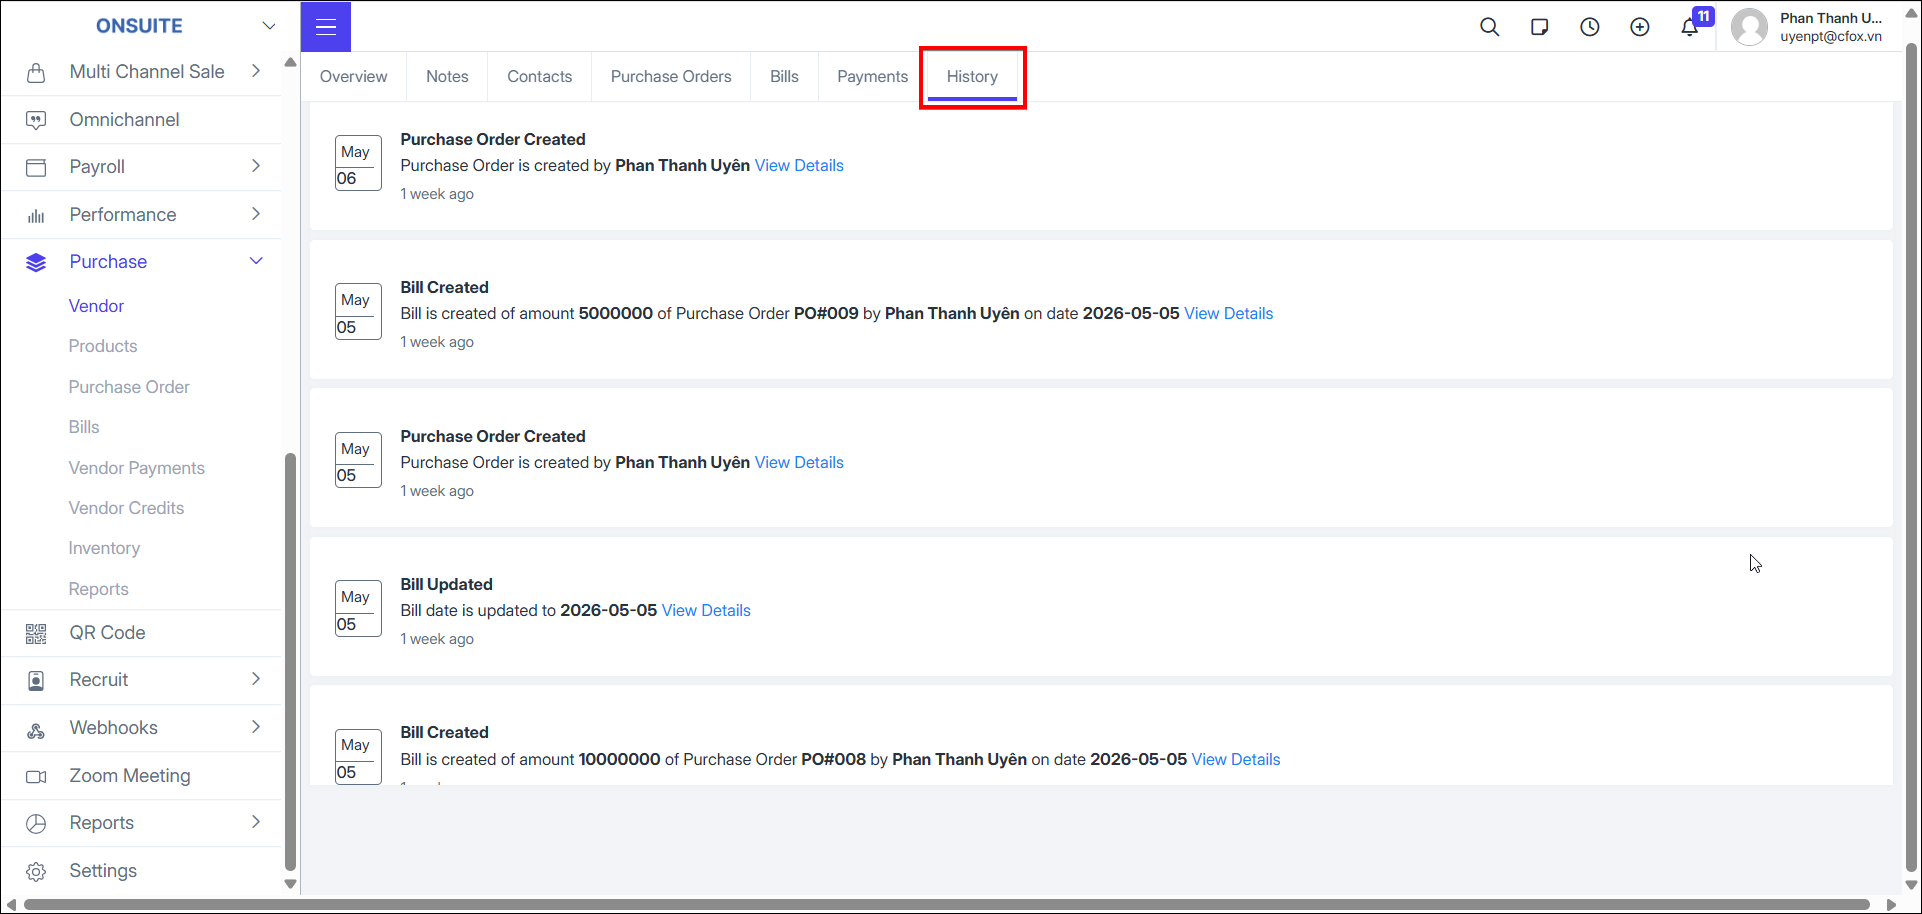
- History: Records the history of actions with the vendor: adding/updating Bills, purchase orders, payments, etc.
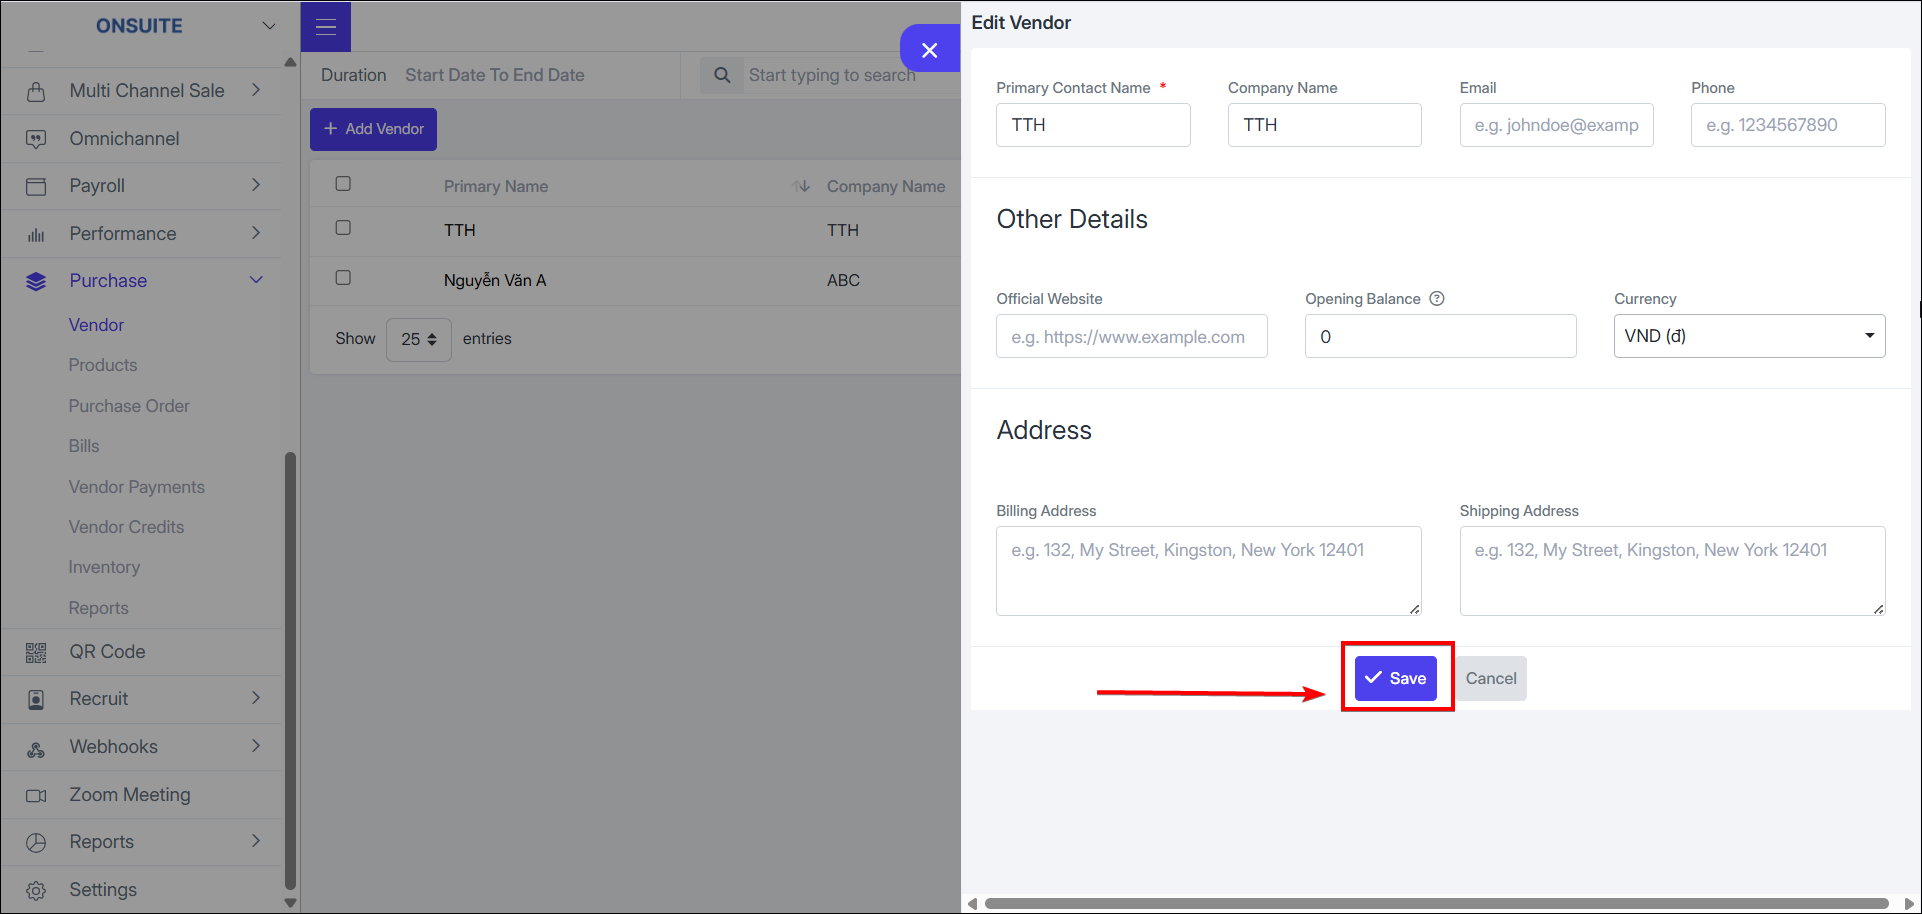
Edit Vendor:
-
Select in action column then select to edit vendor information
-
Change necessary information
-
Select to save changes
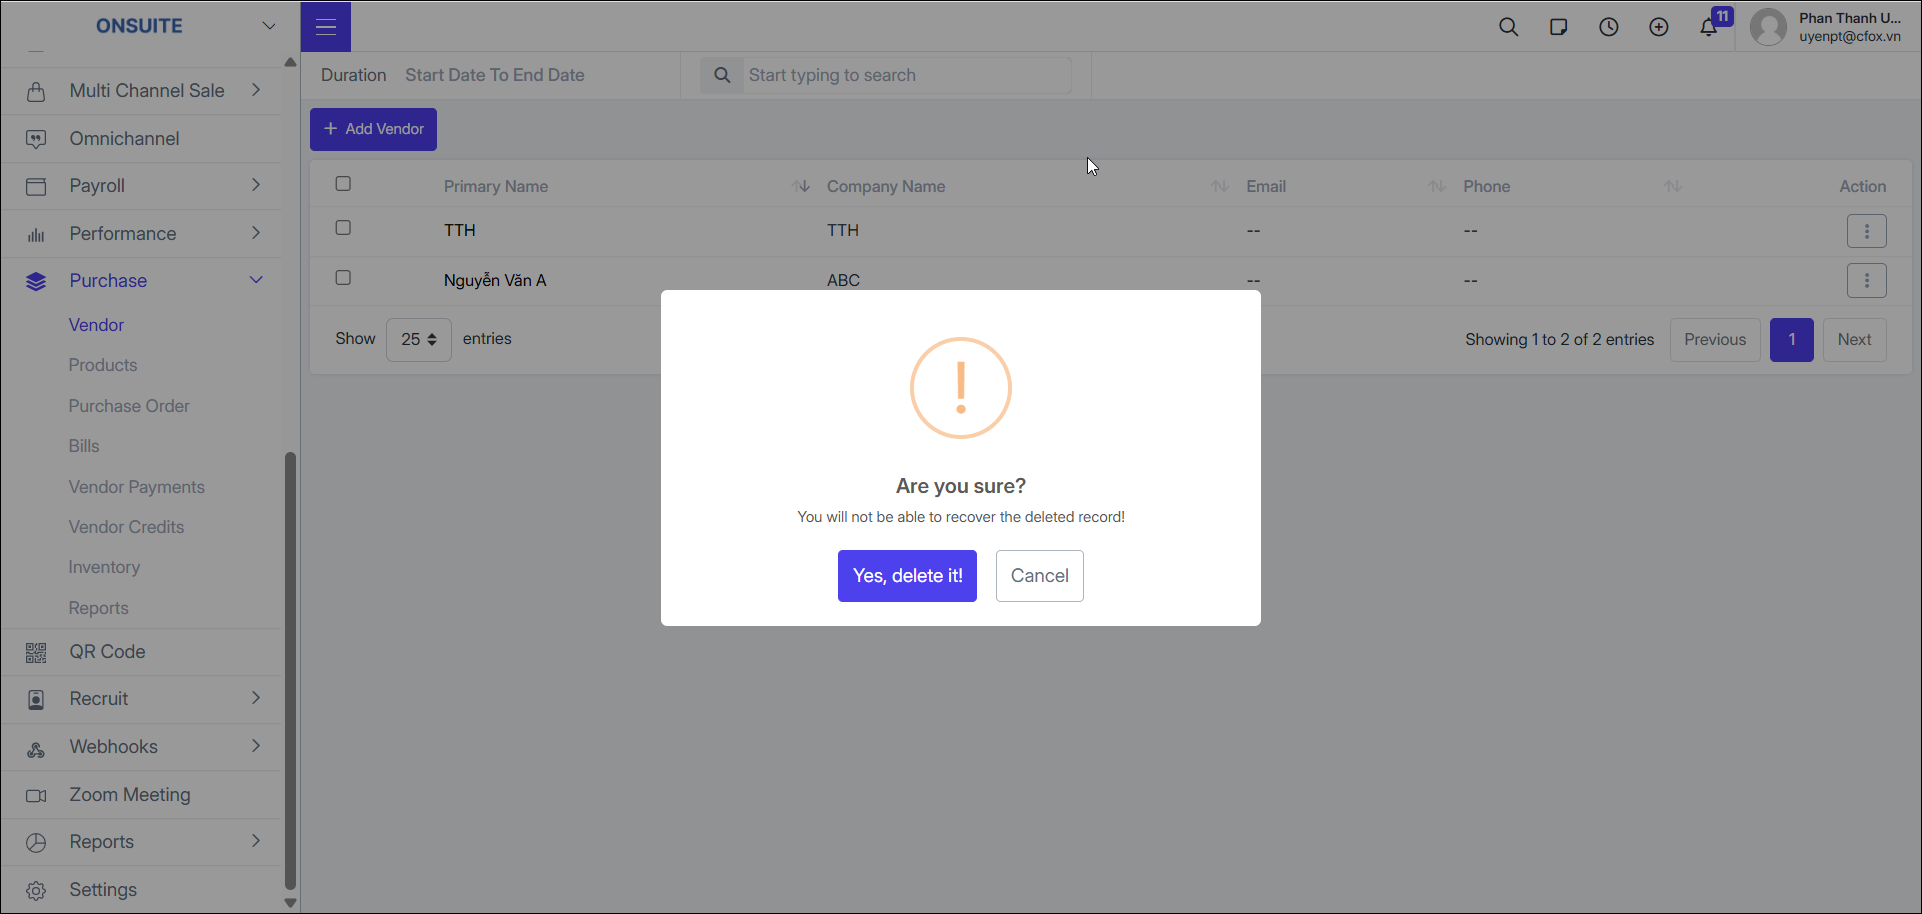
Delete Vendor:
-
Select in action column then select to delete vendor
-
Select to confirm deletion