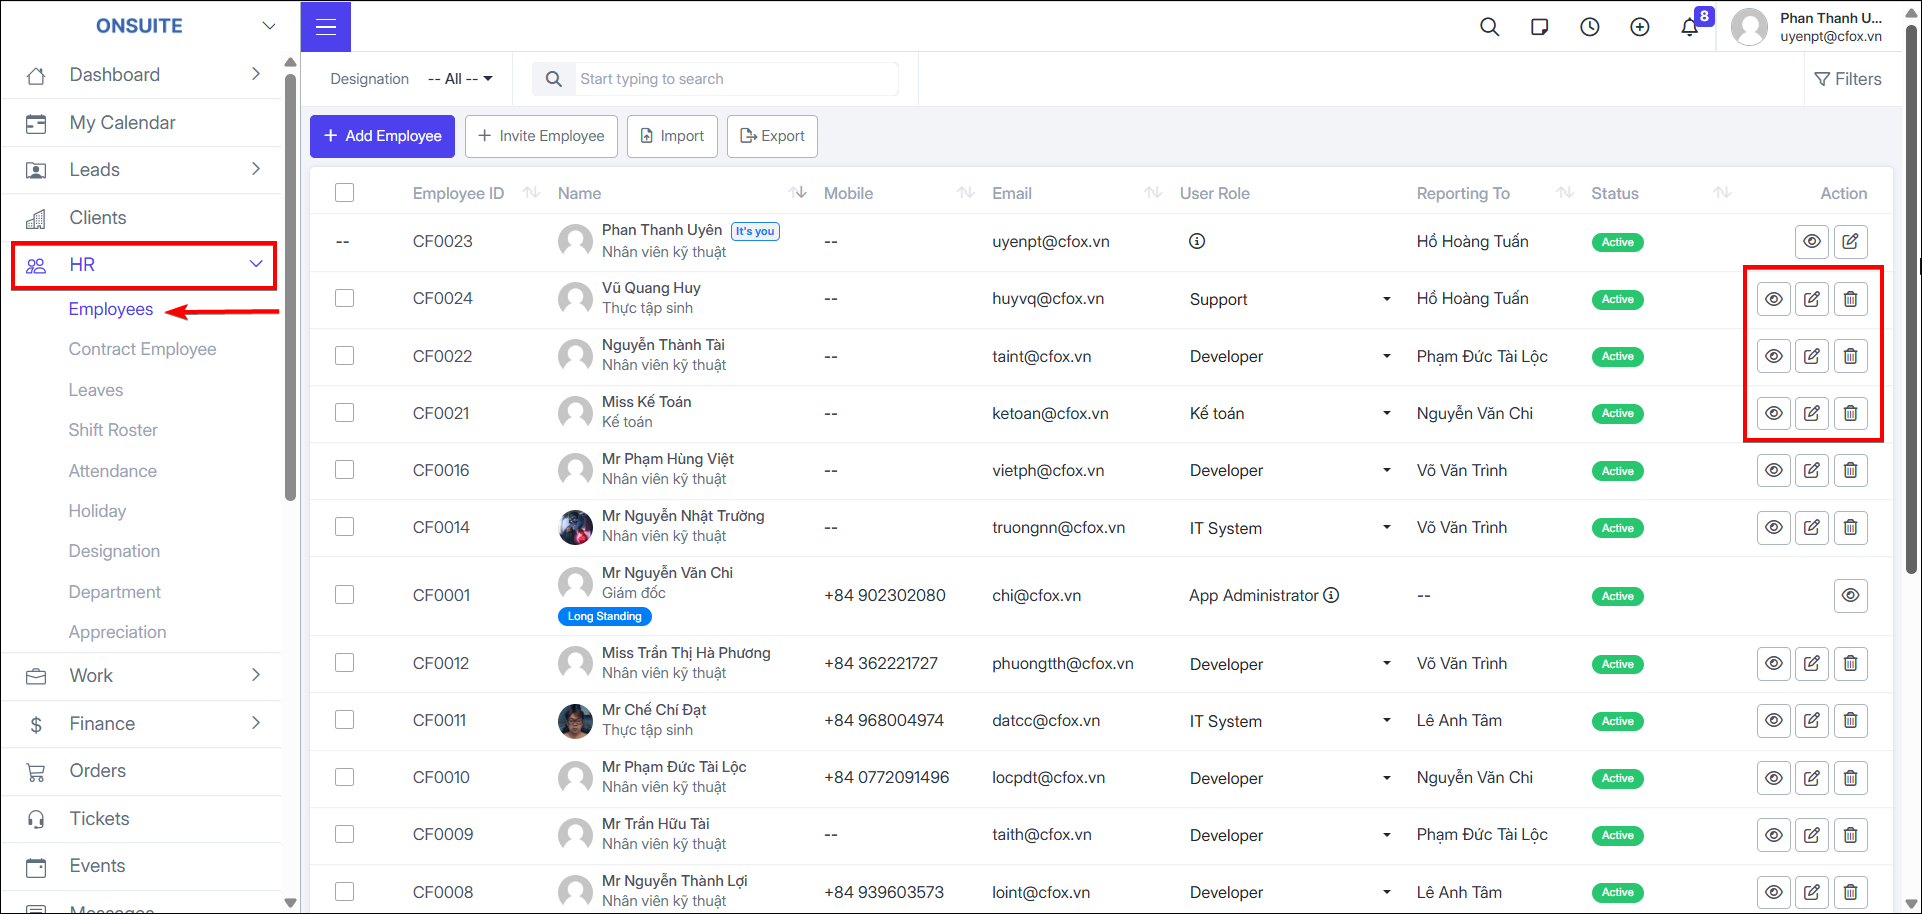
3.1. Employees
-
Go to HR → Employees → Manage employee information
-
Can View / Edit / Delete employees
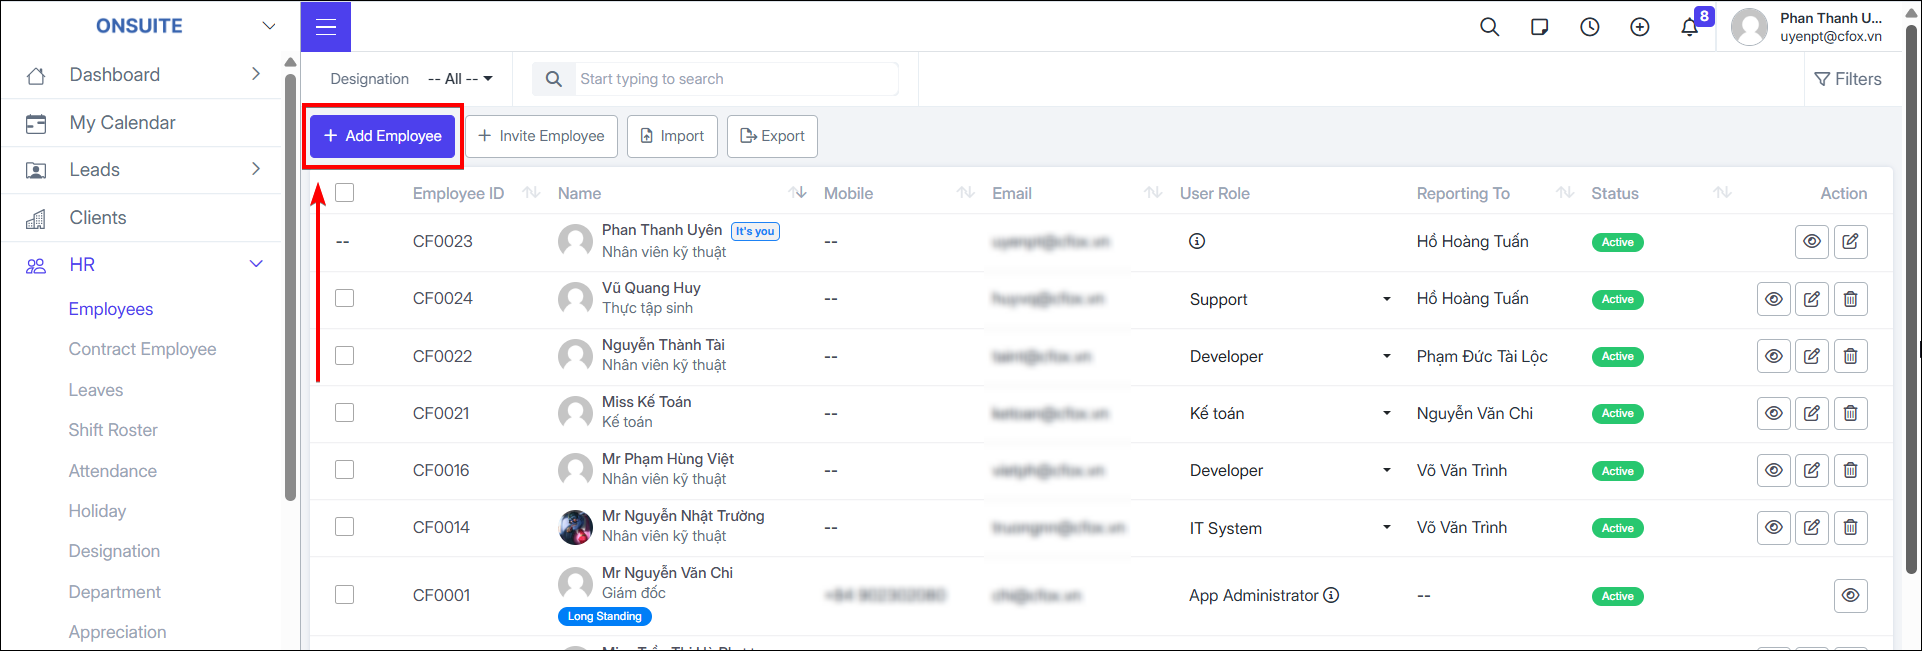
Add Employee:
- Step 1: Select Add Employee
-
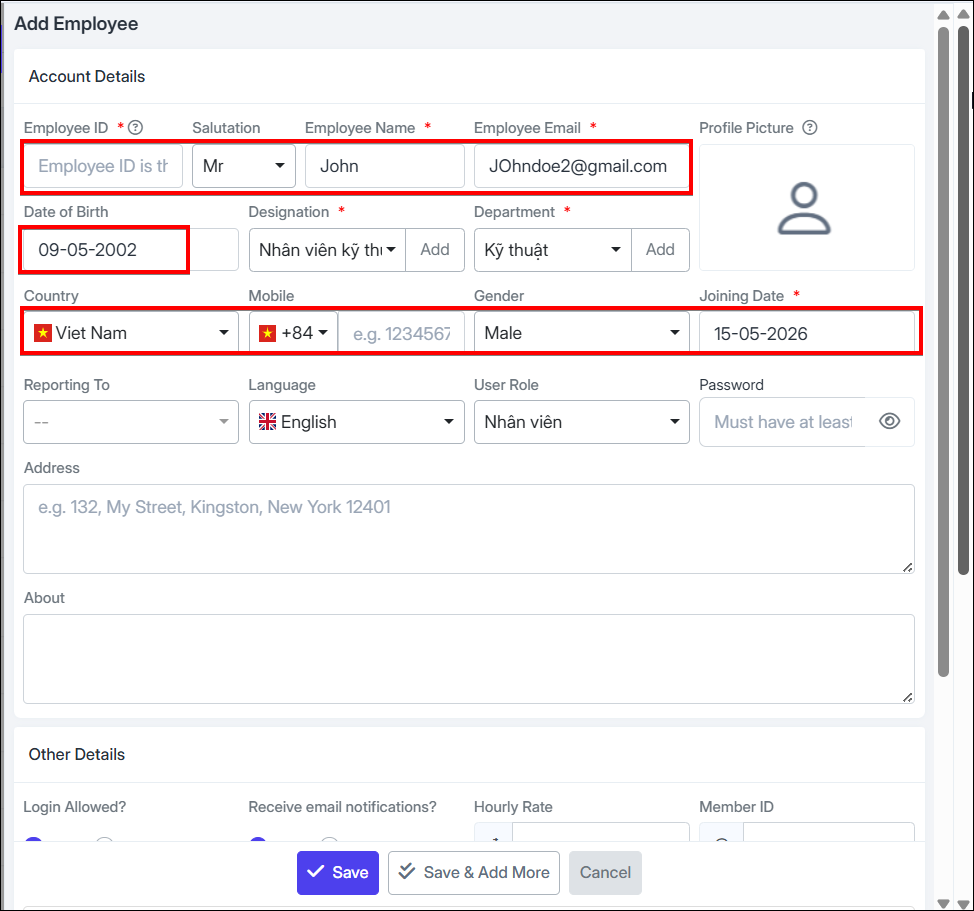
Step 2: Enter basic information:
-
Enter Employee ID (must be unique; if created via invitation, ID is auto-generated and can be edited later)
-
Add title (if needed)
-
Enter personal info: name, gender, date of birth, phone, etc.
-
Email will be the employee's login email and notification email
-
-
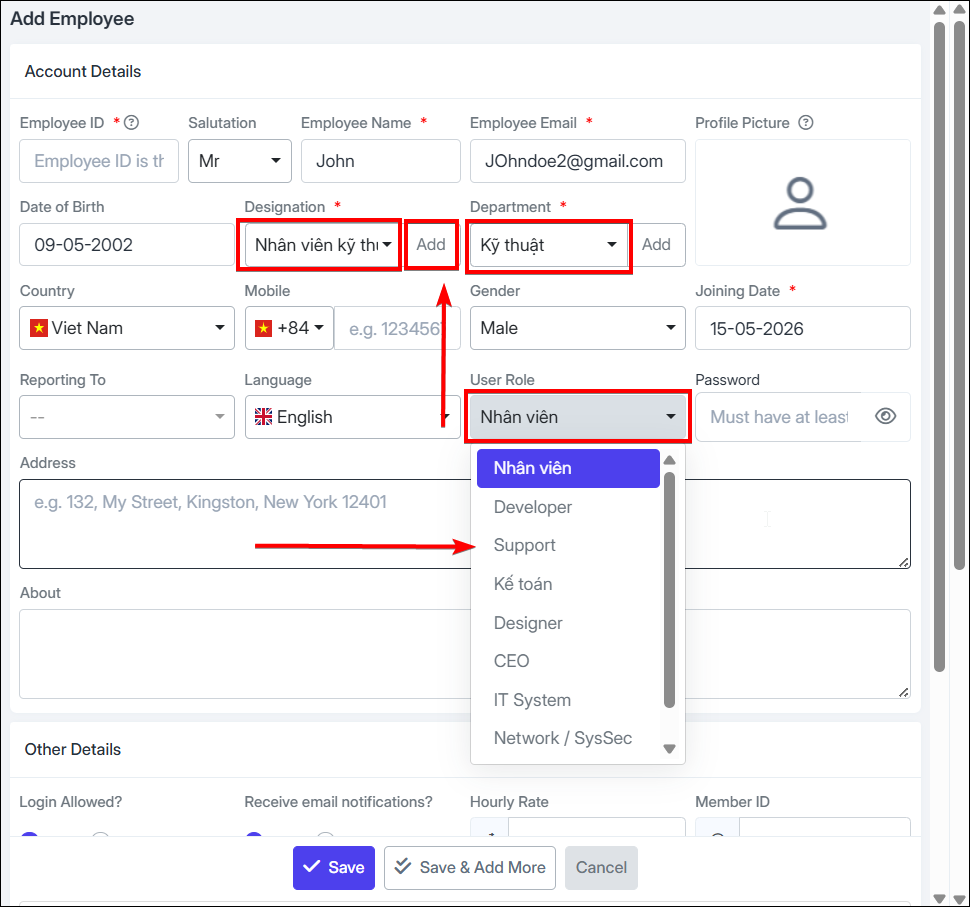
Step 3: Set up organizational information:
-
Select designation and department (can quickly add new)
-
Add managing employee (if any)
-
Select role for the employee
-
-
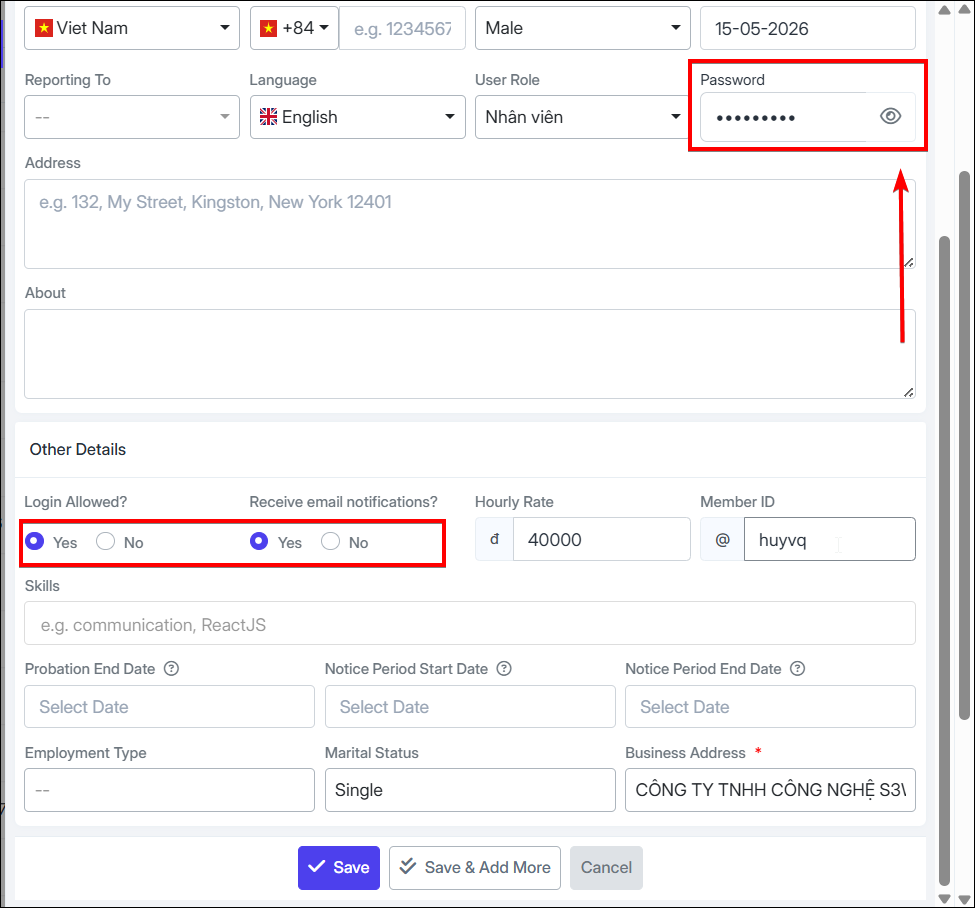
Step 4: Enter additional information:
-
Enter address, short bio (if any)
-
Check to allow login (if allowed, must set a password for the employee)
-
Check to receive email notifications
-
Enter hourly salary
-
Enter member ID
-
Add skills (if any)
-
-
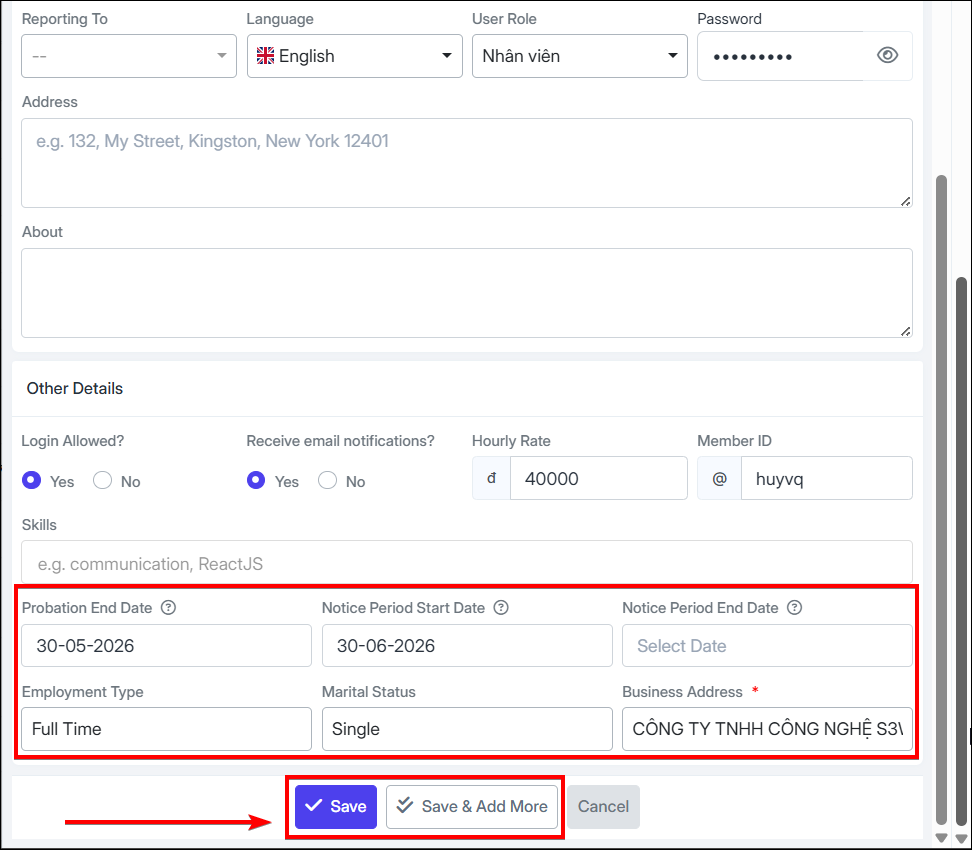
Step 5: Set up work status:
-
New employee: enter probation end date
-
Resigned employee: set notice start date and handover end date
-
Select work type (full time, part time, etc.)
-
Business address defaults to company address
-
-
Step 6: Select Save or Save and Add More Info
-
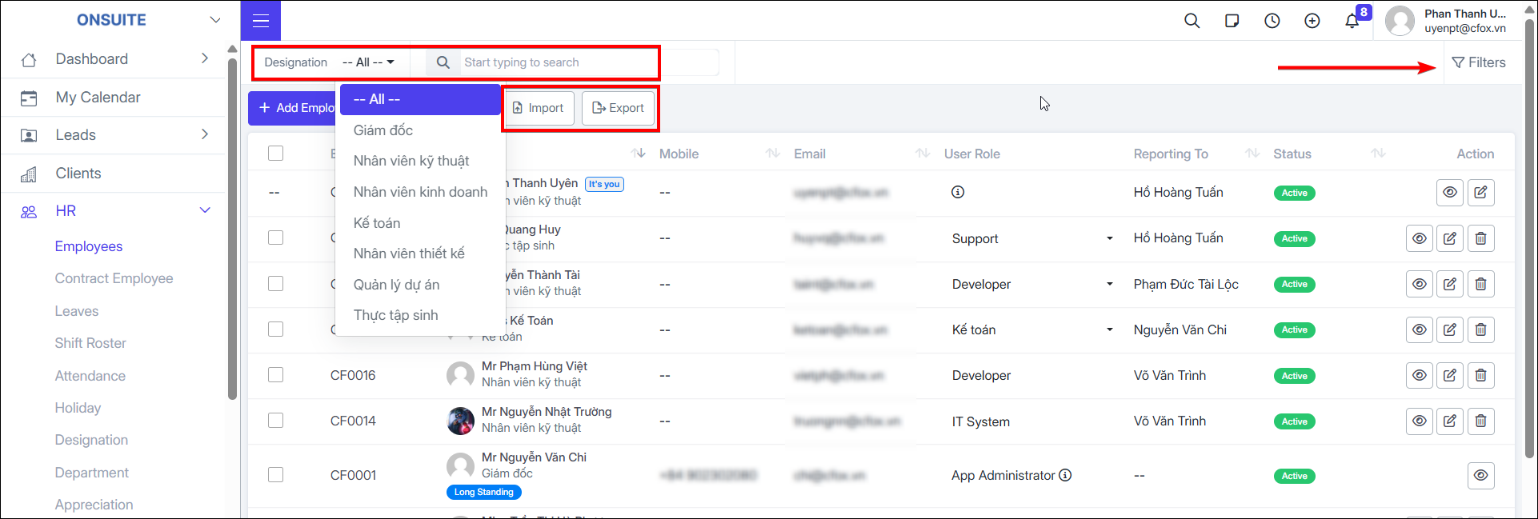
Can Import / Export employee Excel files
-
Can search or filter by designation
-
Advanced filter by: Department, Role, Status, Active, Gender, Employment Type
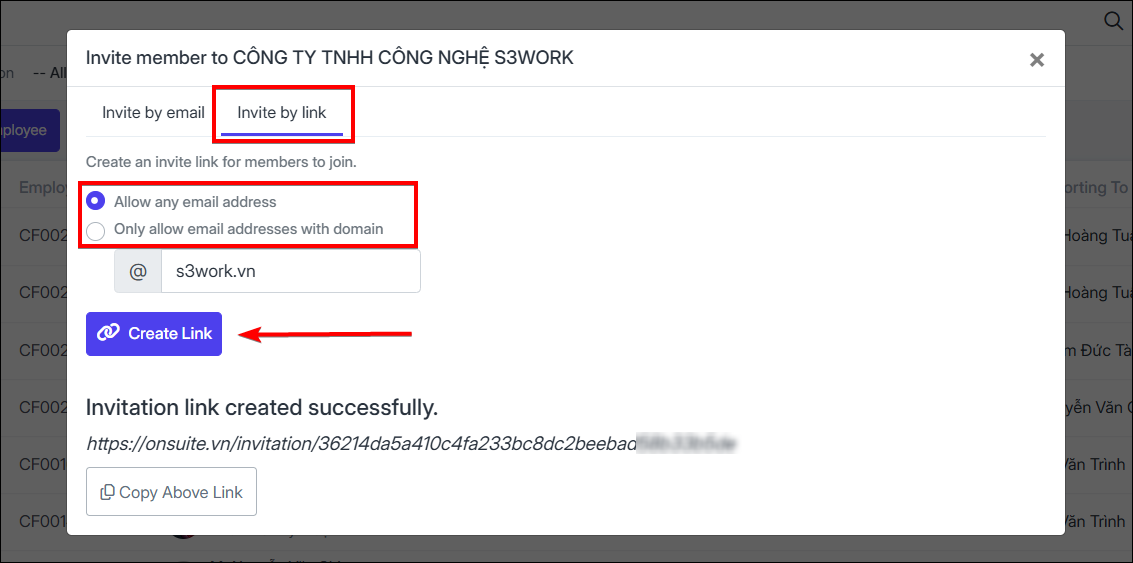
Send Employee Invitation:
- Go to Employees → Select Employee Invitation
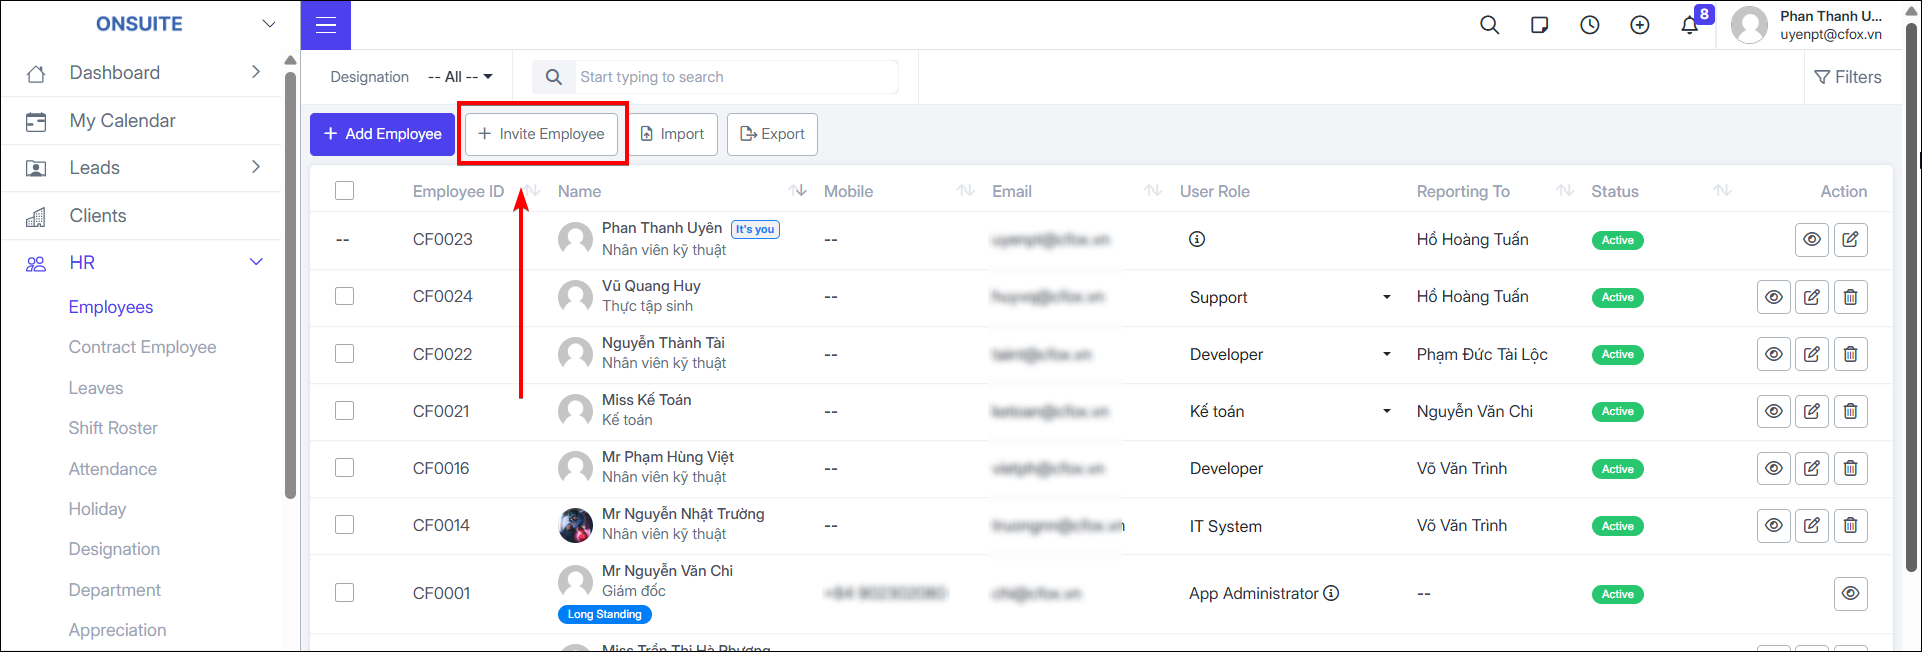
- Enter email and invitation message
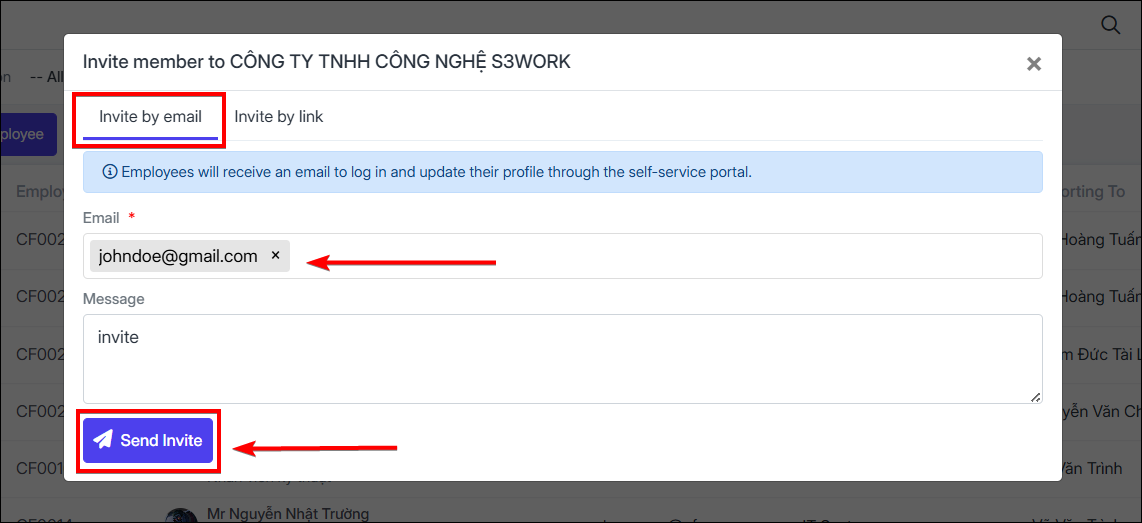
-
Or send via link:
-
Accessible to anyone
-
Or restricted to specific configured emails